Authorise a payment mandate
Configure the authorisation flow so your users can authorise payment mandates.
After you create a mandate, you receive a response that contains a resource_token, a user id and a mandate id.
{
  "id": "{The mandate ID}",
  "user": {
    "id": "{The user ID}"
  },
  "resource_token": "The resource token for the mandate"
}
You need both values to start the authorisation journey for your user.
Like with a payment, your user must authorise any mandates you create before any money can be sent. They do this by authorising the mandate with their their banking provider. To do this, use a browser redirect to send the user to their bank.
There are two options for authorisation: a prebuilt TrueLayer UI, or a direct API integration.
Authorise a mandate with a TrueLayer UI
The first option is to use a TrueLayer web or mobile UI for authorisation. These are simpler to integrate than building your own authorisation UI and customisable to match your brand.
TrueLayer authorisation UIs use the resource_token you get when you generate a mandate and display screens for your user to authorise the mandate. They also include extra information so your user can understand what a mandate is, and are compliant with any applicable regulation.
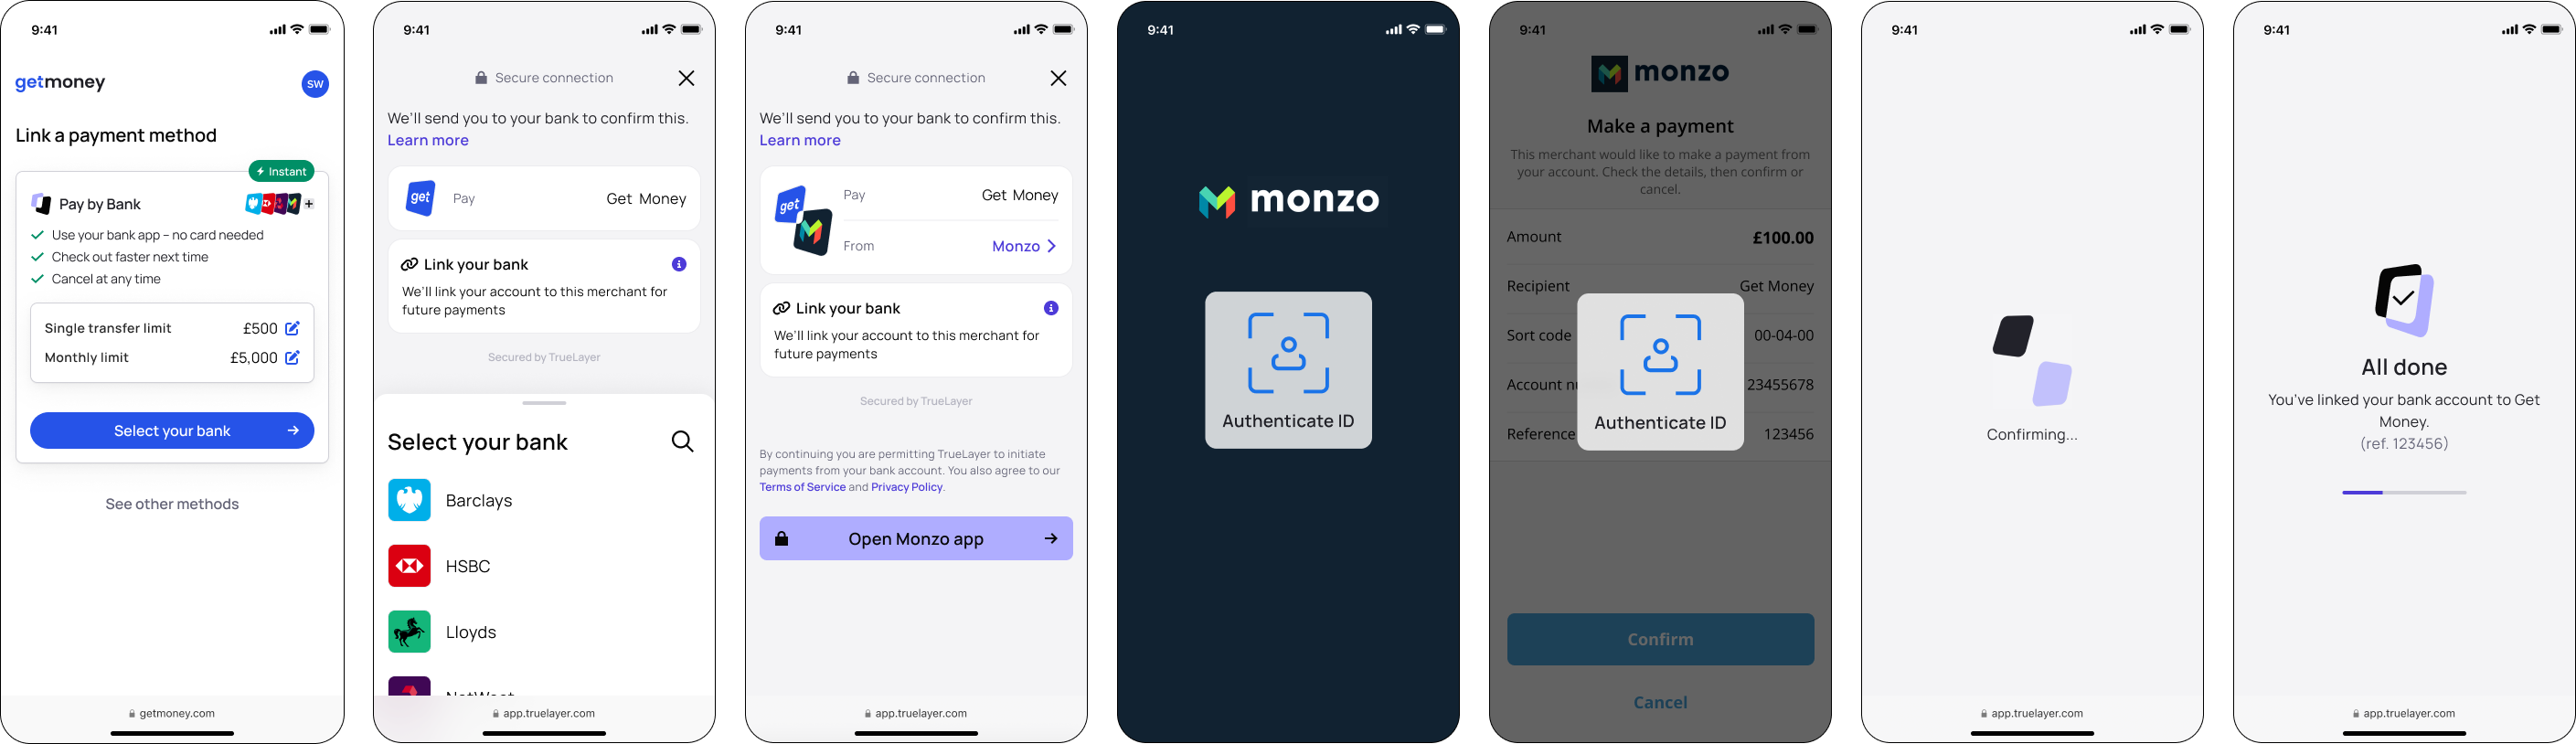
The mandate creation user journey.
Hosted Payment Page
You can enable your users to authorise a mandate by creating a TrueLayer Hosted Payment Page (HPP).
Make sure that you include the mandate_id (instead of the payment_id) inside the hosted page URL.
See below for an example.
https://payment.truelayer.com/mandates#mandate_id={payment_id}&resource_token={resource_token}&return_uri={return_uri}Updated 5 months ago