Payments API basics
New to the Payments API v3? Start here.
The Payments API v3 allows you to make and accept payments and payouts in the UK and EU.
For a detailed list of providers that we support by country, create a Console account and visit the Supported Providers page in Console.
In this guide, when we talk about payments, we generally mean payments that your user makes to your account. When we talk about payouts or refunds, we mean payments that you make to your user's bank account. Most Payments API features require a merchant account, and we recommend that you create one to use any Payments products.
There are two types of single payment that end users can make through TrueLayer:
- A closed-loop pay-in, where they make a single payment into your merchant account.
- A single payment, where they pay a beneficiary using the relevant bank details.
This is also known as a 'single domestic payment' or 'single international payment', as defined in the Open Banking Standards.
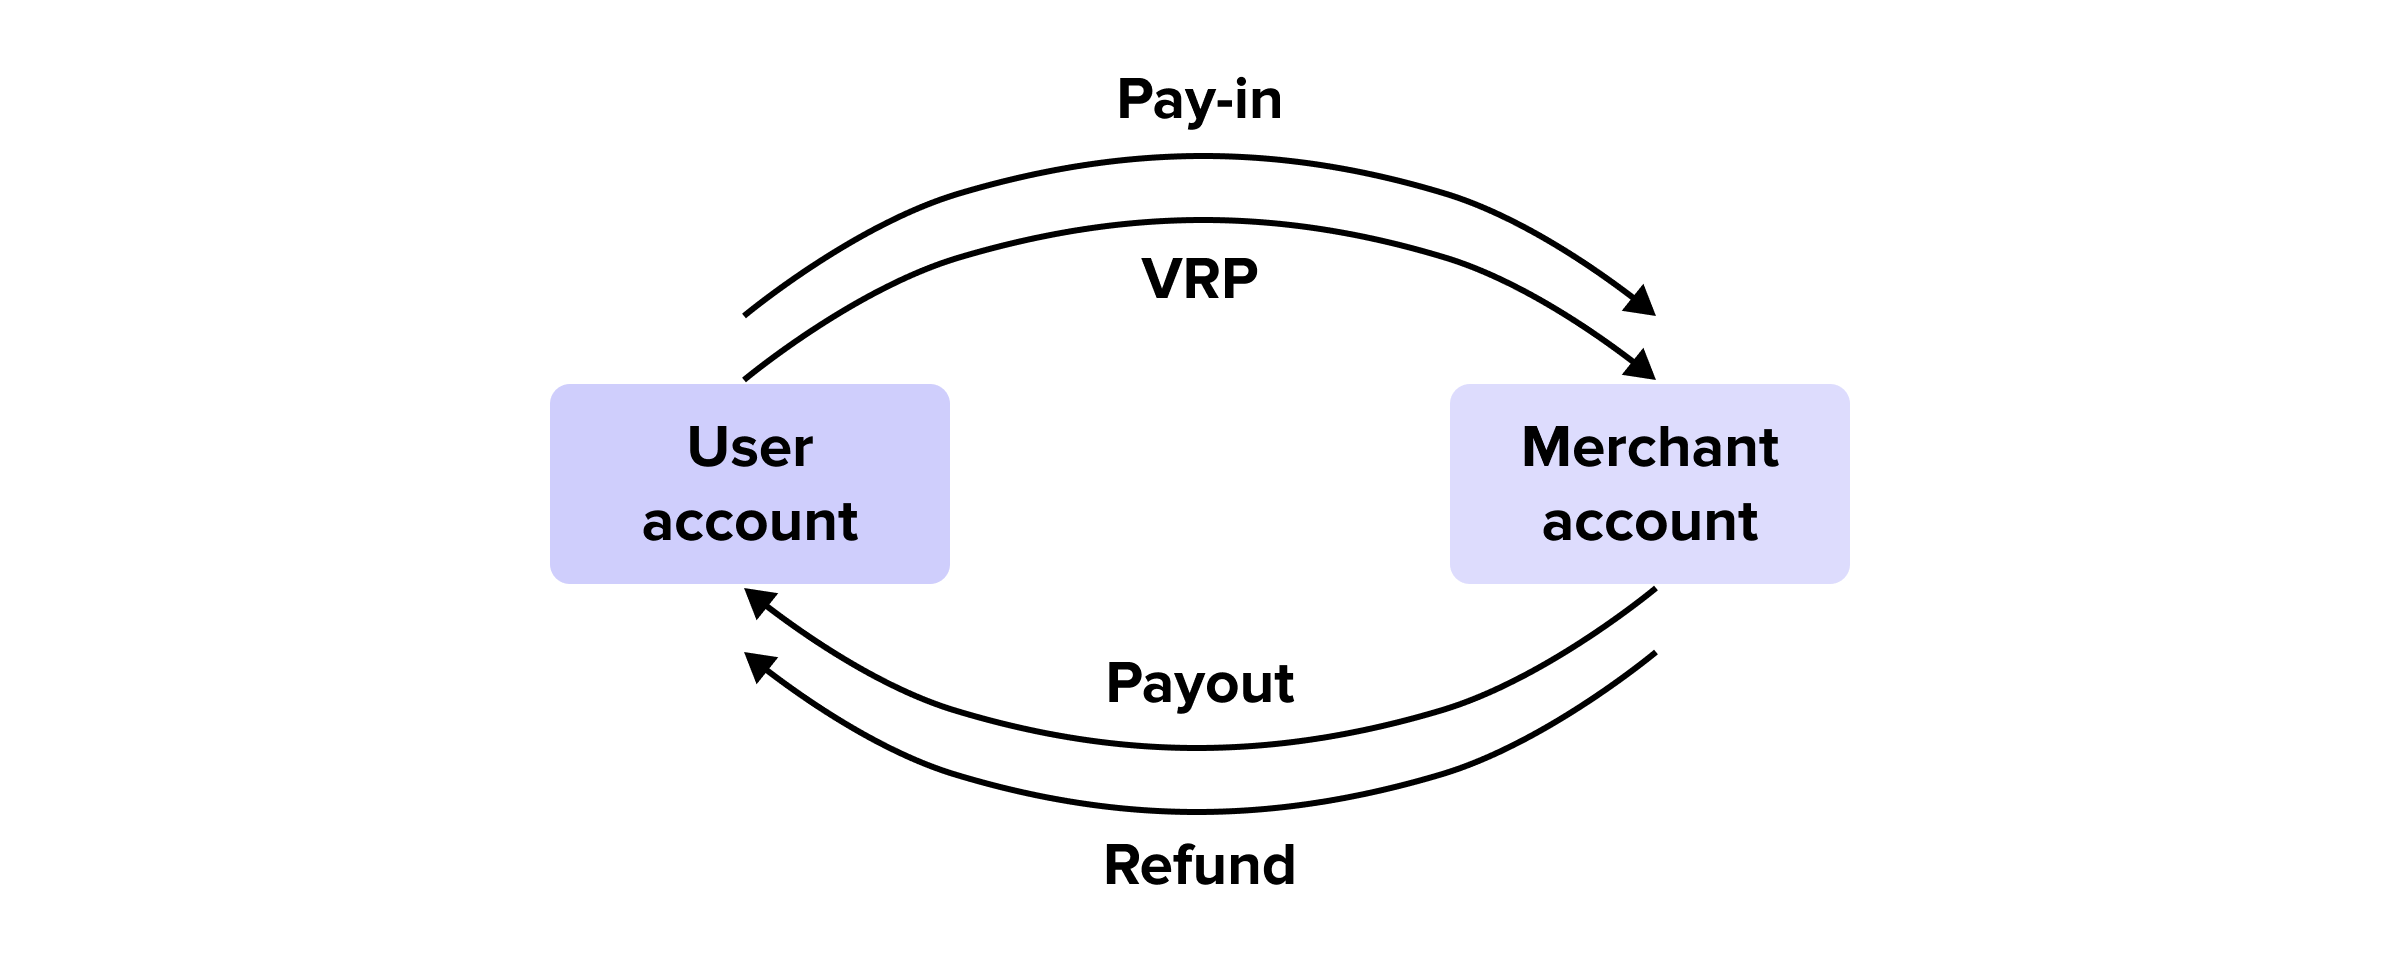
The diagram below illustrates the direction of payments and payouts to and from a merchant and user account.

These are the four key types of payments covered on this page:
- Pay-ins
A payment made from your user's account to your merchant account (pay-in) or bank details (single payment). - Variable recurring payments (VRP)
A series of payments made based on a mandate that determines payment amount and frequency. - Payouts
A payment made from your merchant account to a user account.
These can be closed-loop payouts or open-loop payouts. Note that to make payouts, you must also have the Payouts product. - Refunds
A payment or payments, made back to your user, up to an amount that your user paid you initially.
You do not need the Payouts product to enable refunds.
Payment journey: pay-ins and VRPs
The two types of payment that your user can make using the Payments API are pay-ins and variable recurring payments.
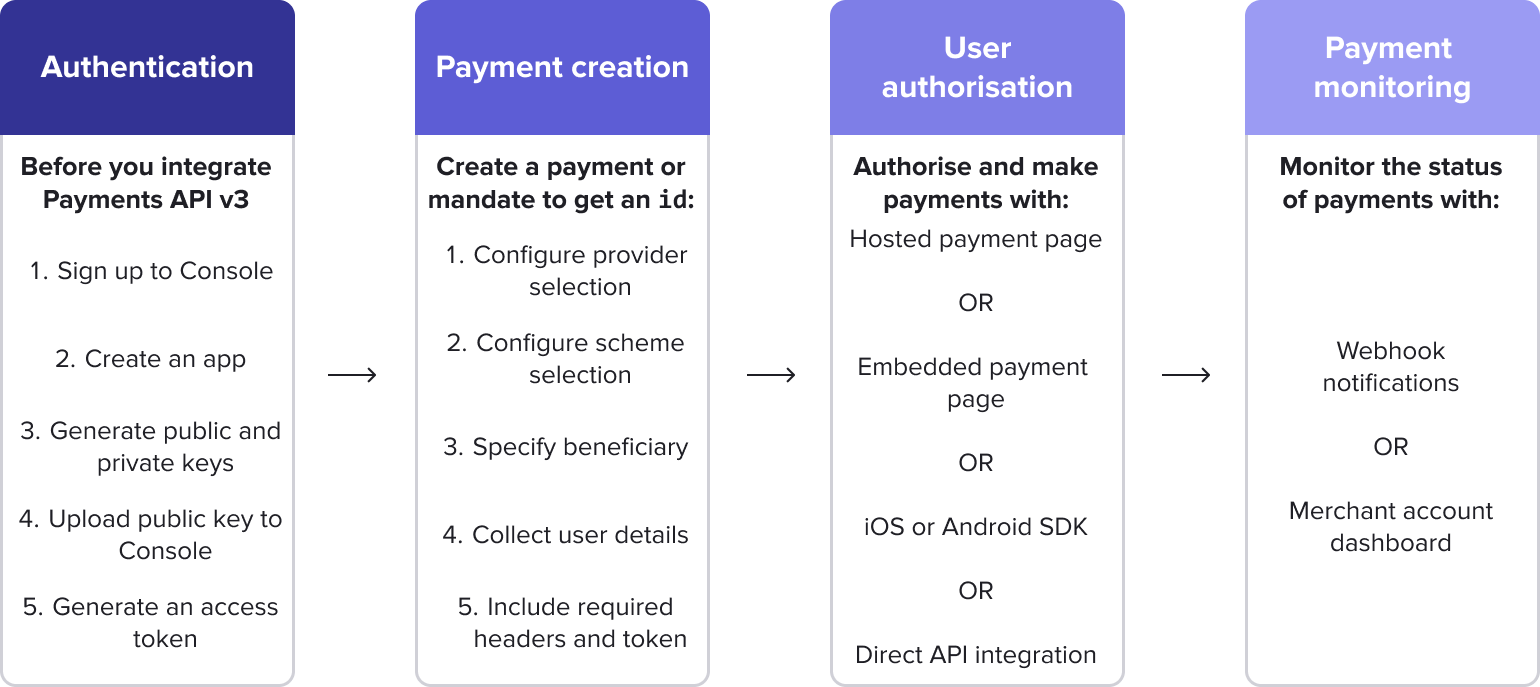
Below is a summary of the flow of a pay-in or variable recurring payment from an external account:

1. Authentication
The first step in making a payment is authentication. Authentication has two parts:
- Generate public and private keys and upload them to Console.
- Generate an access token with the appropriate scopes.
2. Payment creation
To create a closed-loop pay-in or single payment request, you send a POST request to the /v3/payments endpoint. Your request should contain information about the payment, such as its value, whether it's a bank transfer or payment on a mandate, and information about the remitter. Learn more about how to configure your payment requests.
When you create a payment, most of the request is the same for either a merchant account pay-in or a single payment. However, you need to provide a different value for the payment_method.beneficiary.type parameter in your API request.
- For a closed-loop pay-in, use
merchant_account. - For a single payment, use
external_account.
You can still make a single payment into an account that you own.
After you have authenticated, you can create a payment or mandate. Before you start, it's a good idea to test in the sandbox environment with our Insomnia collection.
Once you're familiar with how to create payments with the API, you can choose an integration method to integrate these payments into your application.
On success, the API returns a payment id, which you use for the next step of the payment: authorisation.
3. Payment user authorisation
To initiate a payment or authorise a VRP mandate from your user's account, your user must give their consent. The user interface they see in your app must clearly explain the nature of the payment, along with regulatory information.
The simplest way to ensure that your UI is well-designed and compliant is to use prebuilt payment authorisation UIs, such as our hosted payment page, Web SDK, iOS, Android or React Native SDKs. Alternatively, you can build your own UI with a direct API integration.
4. Payment monitoring
To ensure that a payment has settled into your account, you need to check its status. We recommend that you configure webhooks to do this.
You can also configure when a payment is considered complete with the payment_creditable webhook. By default, you receive this webhook when a payment settles into your merchant account, but you can change this behaviour.
If you're receiving payments to your merchant account, you can also use the payments view in Console. This exportable database of incoming and outgoing transactions is also useful for operational and finance teams.
Creating payments on a mandateThe VRP journey is similar to the payment journey. However, you use an authorised mandate as the payment destination when you create a VRP. Learn more in our VRP guides.
Payment journey: payouts and refunds
The two types of payout that you can make from your merchant account are payouts and refunds.
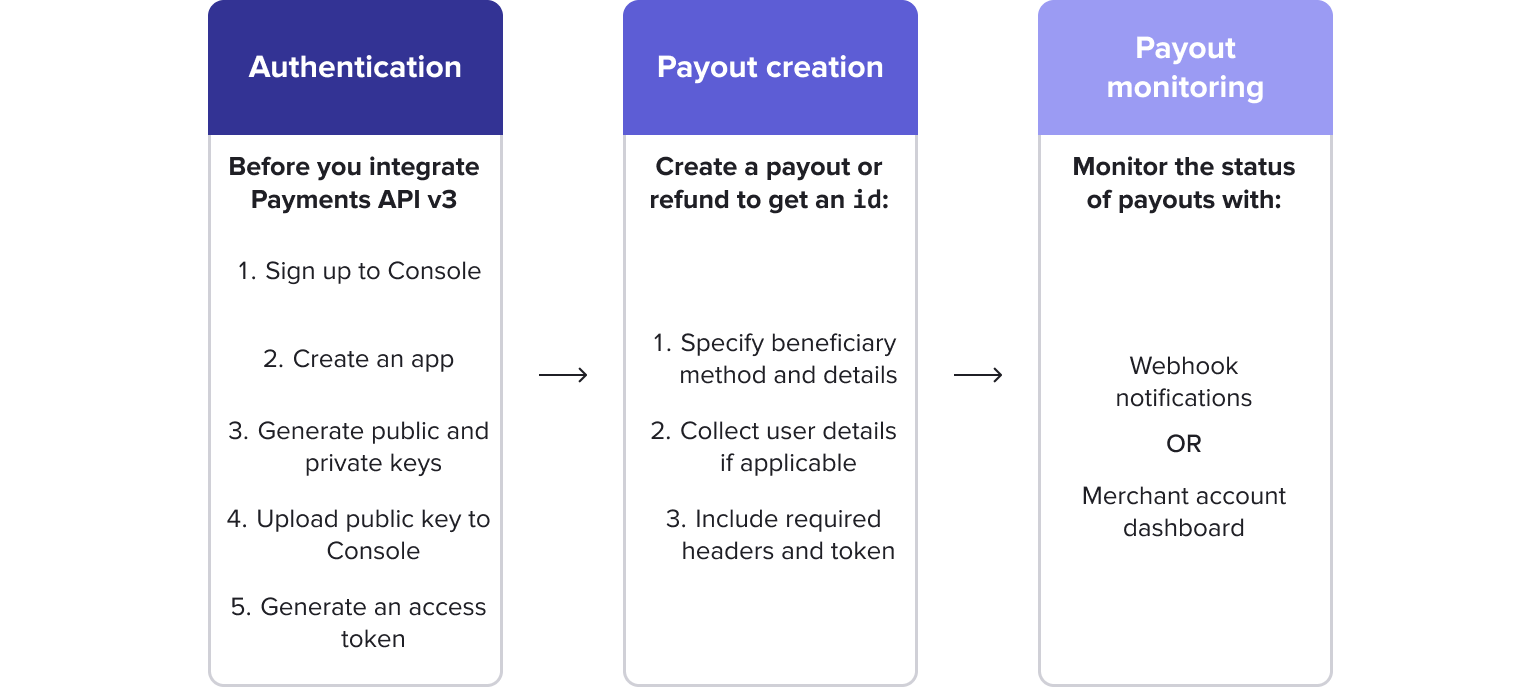
The general flow of a payout looks like this:

1. Authentication
The first step to make a payout from your merchant account is authentication. Much like payment authentication, to authenticate a payout you need:
- public and private keys, uploaded to Console.
- an access token with appropriate scopes.
2. Payout creation
Unlike payments from external accounts, payouts don't require user authorisation.
After you create a payout, it's immediately sent to the bank for processing and your request returns an id. You can use this id to monitor the status of your payout.
3. Payment monitoring
After you make a payout or refund, monitor its status with webhooks or the API.
You can also monitor incoming and outgoing transactions on the merchant account dashboard and payments view in Console.
Low-code integrations
Use ecommerce plugins or payment links to accept payments with a low/no-code integration process.
Start using Payments
Before you can receive or make any payments with the Payments API you need to configure request signing and generate an access token to authenticate your requests.
If you want to start testing quickly, take a look at the Payments quickstart guide, or using the Payments API Insomnia collection.
After you have an access token, you can configure authorisation via a TrueLayer authorisation UI. You can then create different payment types and test in our sandbox environment.
For a full list of the steps you need to take to integrate our products, see our integration checklists for pay-ins and payouts.
Updated about 1 month ago
