Sign your requests and make them idempotent
Generate public and private keys
and use them to sign API
requests.
The Payments API v3 uses a pair of ECDSA keys in addition to a bearer token. The keys are a form of encryption that ensures your payments are secure.
With this form of encryption, you upload one public key to your Console account, and provide the other private key with your Payments v3 API requests. The combination of keys verifies and authenticates the request.
Signing keys are required for Payments onlyData v3 API requests do not require signing keys, but do require access tokens with the correct scopes.
Payments API signing libraries
Client libraries
We provide client libraries and signing libraries in a variety of programming languages to simplify the integration process.
To make this process easier, we recommend using one of the client libraries, which include functionality for signing requests and webhooks. Request signing and validating webhook signatures are the most complex and time-consuming parts of integration for the Payments API. Client libraries help simplify this so you can get up and running faster.
If you're not using the client libraries, you can also sign requests manually, but we don't recommend using this method.
Signing libraries
Alternatively, if you want to use your own code, you can also implement one of our signing libraries just for this purpose.
To explore our client libraries and signing libraries, visit the TrueLayer Github. There are also example requests in the procedure below.
We offer signing libraries in these languages:
1. Sign up for Console
Before you can sign your requests, you must sign up for a Console account.
2. Generate your key pair
To generate your key pair, you can use OpenSSL or LibreSSL, which are installed on MacOS and Windows by default. To do so:
- Open the command line.
- Use these commands to generate your key pair:
openssl ecparam -genkey -name secp521r1 -noout -out ec512-private-key.pemopenssl ec -in ec512-private-key.pem -pubout -out ec512-public-key.pemThe keys, named ec512-private-key.pem and ec512-public-key.pem by default, are generated in your current working directory.
Ensure that you store your private key securely.
To learn more about how to use the command line, see the Apple or Microsoft documentation.
3. Upload your public key to Console
- Go to Console > Payments > Settings.
- Upload your public key in the Signing keys box.
When you upload your public key, a KID is generated on this page. This is different to your public key itself, and is required to sign your requests.
4. Use a library to set up request signing
The end result of setting up request signing is that you can include a correctly formatted header named Tl-signature with your requests. This header includes the private key you generated earlier.
We recommend using our backend libraries. These include functionality to sign requests and webhooks for you, without having to sign them manually or use a separate signing library. In our Github, we maintain request signing libraries in a range of languages, so you can use the one best suited to your integration.
For example, a Tl-Signature looks like this in our Java request signing library:
// `Tl-Signature` value to send with the request
String tlSignature = Signer.from(kid, privateKey)
        .header("Idempotency-Key", idempotencyKey)
        .method("post")
        .path(path)
        .body(body)
        .sign();
//
using TrueLayer.Signing;
// `Tl-Signature` value to send with the request.
var tlSignature = Signer.SignWithPem(kid, privateKey)
.Method("POST")
.Path(path)
.Header("Idempotency-Key", idempotency_key)
.Body(body)
.Sign();// require using Composer
$ composer require truelayer/signing
// create a Signer instance
use TrueLayer\Signing\Signer;
$signer = Signer::signWithPemFile('kid-value', '/path/to/privatekey');
// create a signature
use TrueLayer\Signing\Signer;
$signature = $signer->method('POST')
->path('/path') // The api path
->header('Idempotency-Key', 'my-key') // The idempotency key you must send with your request
->body('stringified request body')
->sign(); # install signing library
pip install truelayer-signing
# `Tl-Signature` header value to send with the request
tl_signature = sign_with_pem(KID, PRIVATE_KEY) \
.set_method(HttpMethod.POST) \
.set_path(path) \
.add_header("Idempotency-Key", idempotency_key) \
.set_body(body) \
.sign()# install the gem manually
gem install truelayer-signing
# set your public and private key as variables
require "truelayer-signing"
TrueLayerSigning.certificate_id = "your-kid"
TrueLayerSigning.private_key = "your-private-key"
# `Tl-Signature` header value to send with the request
tl_signature = TrueLayerSigning.sign_with_pem
.set_method("POST")
.set_path(path)
.add_header("Idempotency-Key", idempotency_key)
.set_body(body)
.sign// `Tl-Signature` value to send with the request.
let tl_signature = truelayer_signing::sign_with_pem(kid, private_key)
.method(Method::Post)
.path("/payouts")
.header("Idempotency-Key", idempotency_key)
.body(body)
.build_signer()
.sign()?;// `Tl-Signature` value to send with the request.
signature, err := tlsigning.SignWithPem(Kid, privateKeyBytes).
Method("POST").
Path("/payouts").
Header("Idempotency-Key", idempotencyKey).
Body(body).
Sign()The path variable refers to everything that comes after truelayer.com in the API request.
Common request signing issues
When you set up request signing, make sure to check for these common issues.
- Whichever library you use, ensure that the
paththat you sign is the same as the path used to send the request. For example, if you're testinghttps://api.truelayer-sandbox.com/test-signature, the path must be/test-signature. - All signed headers sent with a request must be exactly as they were signed, with none missing. So if you sign
Idempotency-Keyyou must also send exactly the same value in the request. - Ensure that the body passed to the signing library matches the body sent with the request exactly, byte for byte. It must not be formatted differently or have fields in a different order.
- Ensure the request body has no trailing newlines if it was not signed that way.
- Ensure the public key and private key you are signing with match the KID (Public Key ID) in our Console. You can find your KID by going to the Settings tab, then scrolling down to Payments settings.
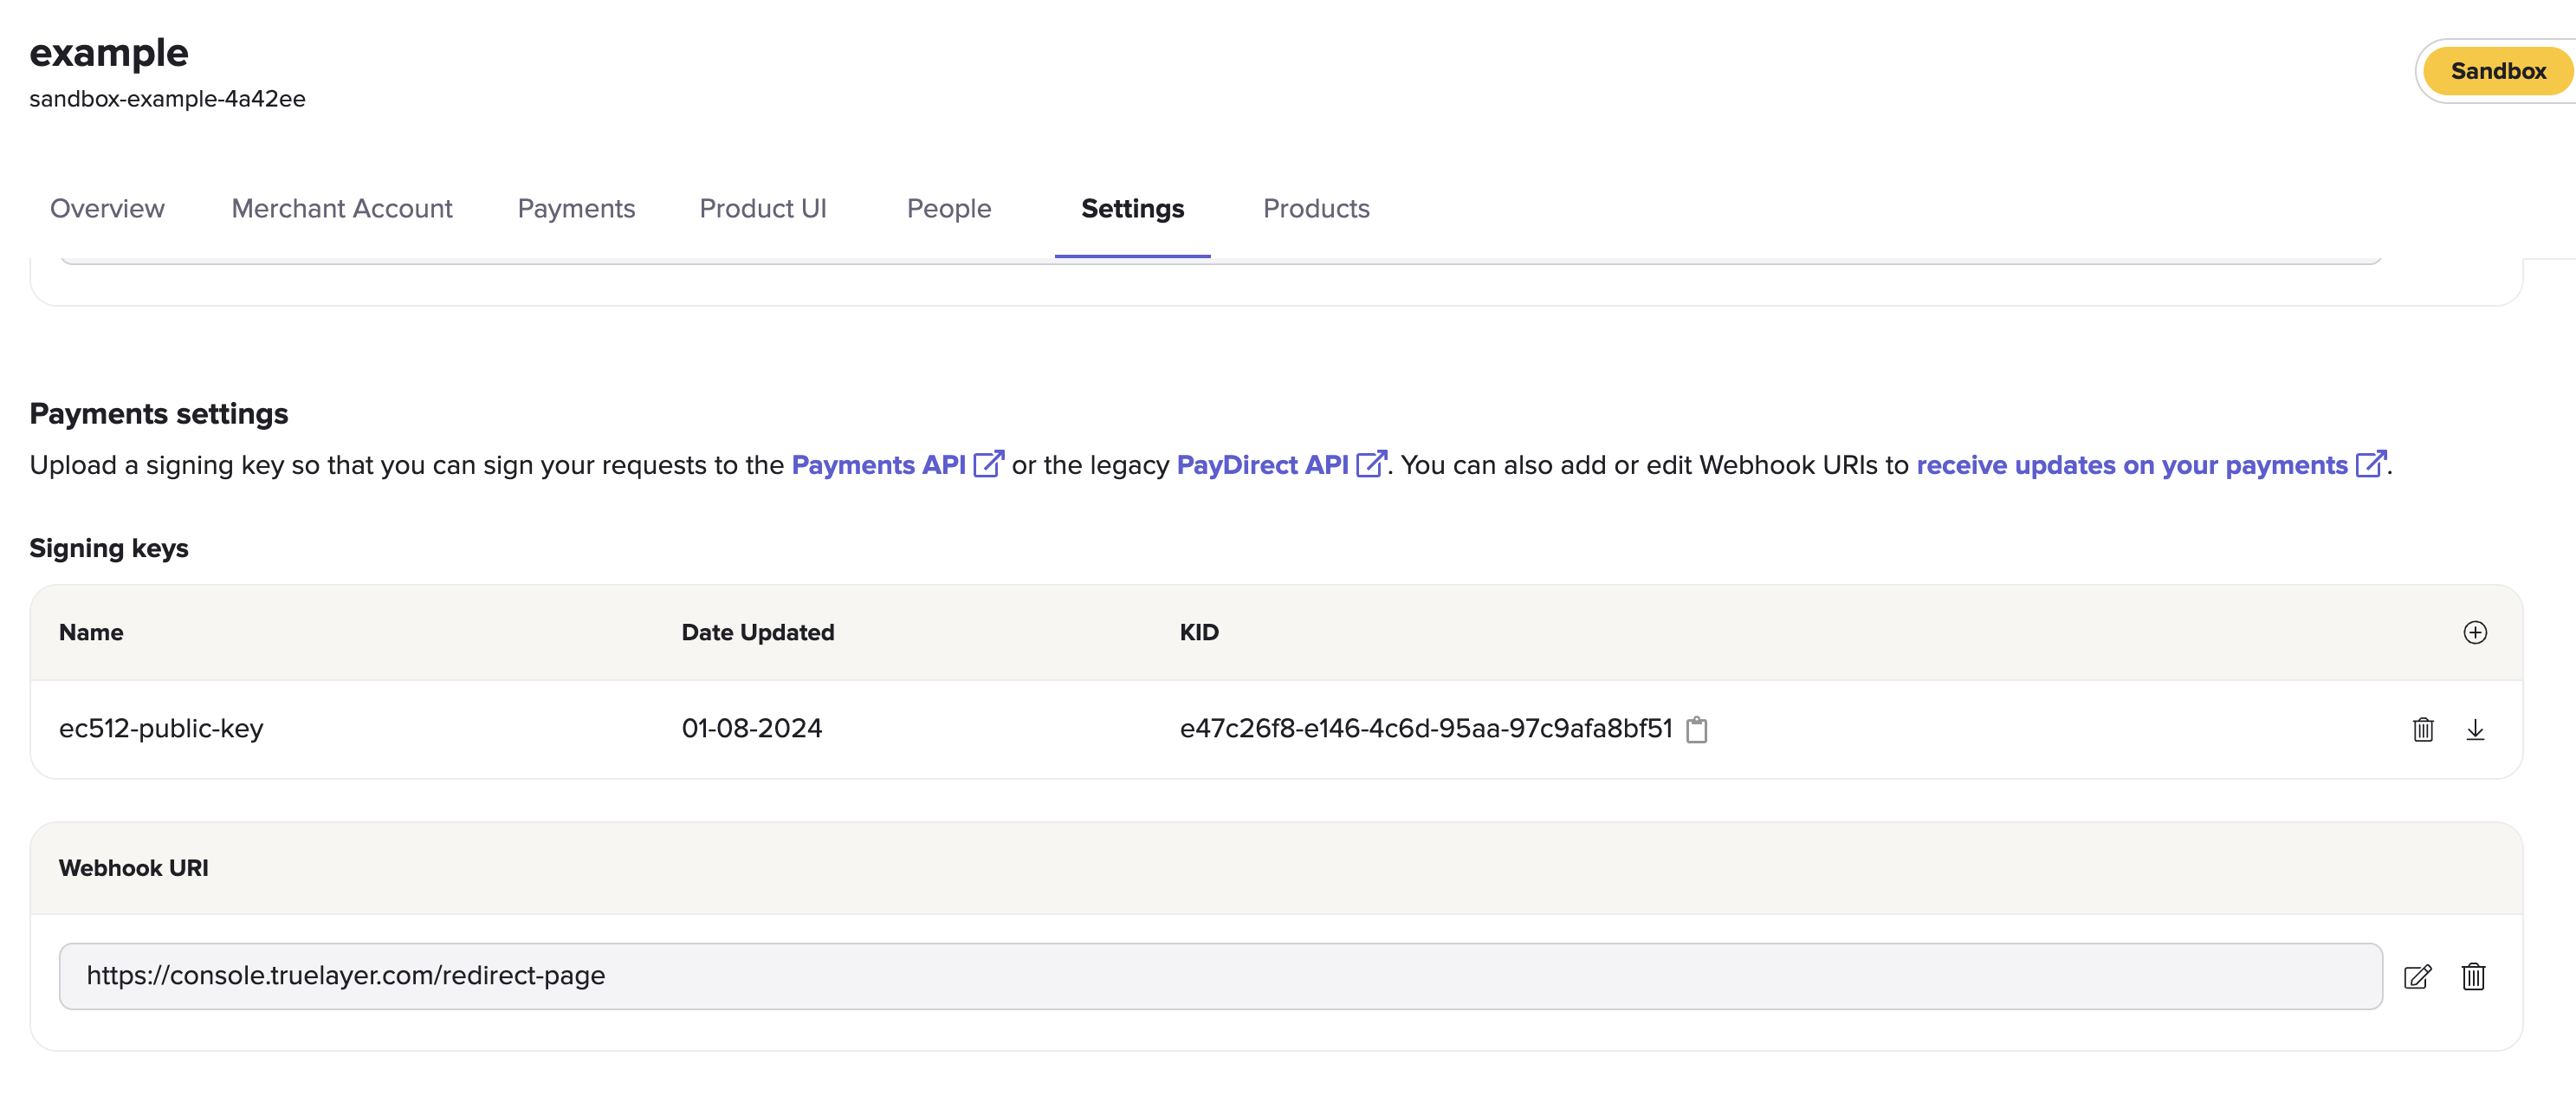
Payments settings inside the Settings tab, with example sandbox public key.
5. Test your request signing
You can send a POST or DELETE request to our /test-signature endpoint to check if your configuration works. If correctly configured, the endpoint validates your Tl-signature and returns a 204 No Content response. It doesn't validate your request body.
This is an example of a request to the /test-signature endpoint:
curl -X POST \
	-H "Authorization: Bearer ${access_token}" \
	-H "Tl-Signature: ${signature}" \
	--data '{"nonce":"9f952b2e-1675-4be8-bb39-6f4343803c2f"}' \
	https://api.truelayer-sandbox.com/test-signature
Idempotency
The Payments API v3 supports API idempotency, and most Payments API requests require you to include an Idempotency-Key header. This enables you to attempt to resend requests while only performing the requested action once, for as long as the key is valid. Idempotency keys are valid for 30 days from creation.
For example, if there's a temporary connection issue, a request to create a payment could be safely retried several times without creating multiple payments.
Always use a different idempotency key for different requestsYou must use different idempotency keys for different requests. Reusing the same idempotency key will cause any requests after the first to not be executed. If you try to reuse of an idempotency key with a different payload, while the key is still valid, you get an error response.
How to enable idempotency for requests
To implement idempotency, add the Idempotency-Key header as shown in this example.
POST /v3/payments HTTP/1.1
Content-Type: application/json
Idempotency-Key: 3c9ae5ea-980f-4ebd-a027-04529942b95e
Tl-Signature: {Signature}
Authorization: Bearer {access_token}
....
UUIDv4We strongly advise that you use a UUID v4 for each idempotency key.
If you can't use a UUID and the endpoint doesn't require an authorisation token (such as the/v3/payments-provider-returnendpoint), we recommend that you also include your client id in your idempotency key.
Scope and validity
Each idempotency key has a duration of 30 days.
During the validity period, you can only send the same payload with the same idempotency key. If you do this, you receive an identical response.
If the payload is different, but the idempotency key is the same, you receive an error. The error type will usually be 422 or 409. See below for more information.
Retrying idempotent requests
Whenever you make a request to the Payments API that includes the Idempotency-Key header, the response contains the Tl-Should-Retry header. This is a Boolean field that tells you whether retrying the request with the same idempotency key could return a different result.
If Tl-Should-Retry has a value of:
false, you will receive the same response when you retry the request with the same idempotency key.true, you might receive a different response when you retry the request with the same idempotency key.
If your response doesn't contain theTl-Should-Retryheader, the default behaviour is the same astrue.
Error handling
These are some of the common errors associated with idempotency:
| Error code | Error type | Detail | Solution |
|---|---|---|---|
| 401 | Unauthenticated | Invalid request signature. | Include the Idempotency-Key header in the JOSE headers of the signature when making requests to endpoints where idempotency is mandatory. |
| 409 | Idempotency-Key Concurrency Conflict | The Idempotency-Key value is being used for a concurrent request. | This error occurs because another request with the same idempotency key is in flight. If you wait until the request is no longer in flight and make the same request with the same idempotency key, you receive an identical response. |
| 422 | Idempotency-Key Reuse | The Idempotency-Key value has already been used for a different request. | This should not happen if idempotent retries have been correctly implemented, so if this error is received it is advised not to attempt a retry. In your idempotent retry implementation ensure that the request body is identical on retries. |
curl -X POST \
	-H "Authorization: Bearer ${access_token}" \
	-H "Tl-Signature: ${signature}" \
	--data '{"nonce":"9f952b2e-1675-4be8-bb39-6f4343803c2f"}' \
	https://api.truelayer-sandbox.com/test-signature
Updated about 1 month ago