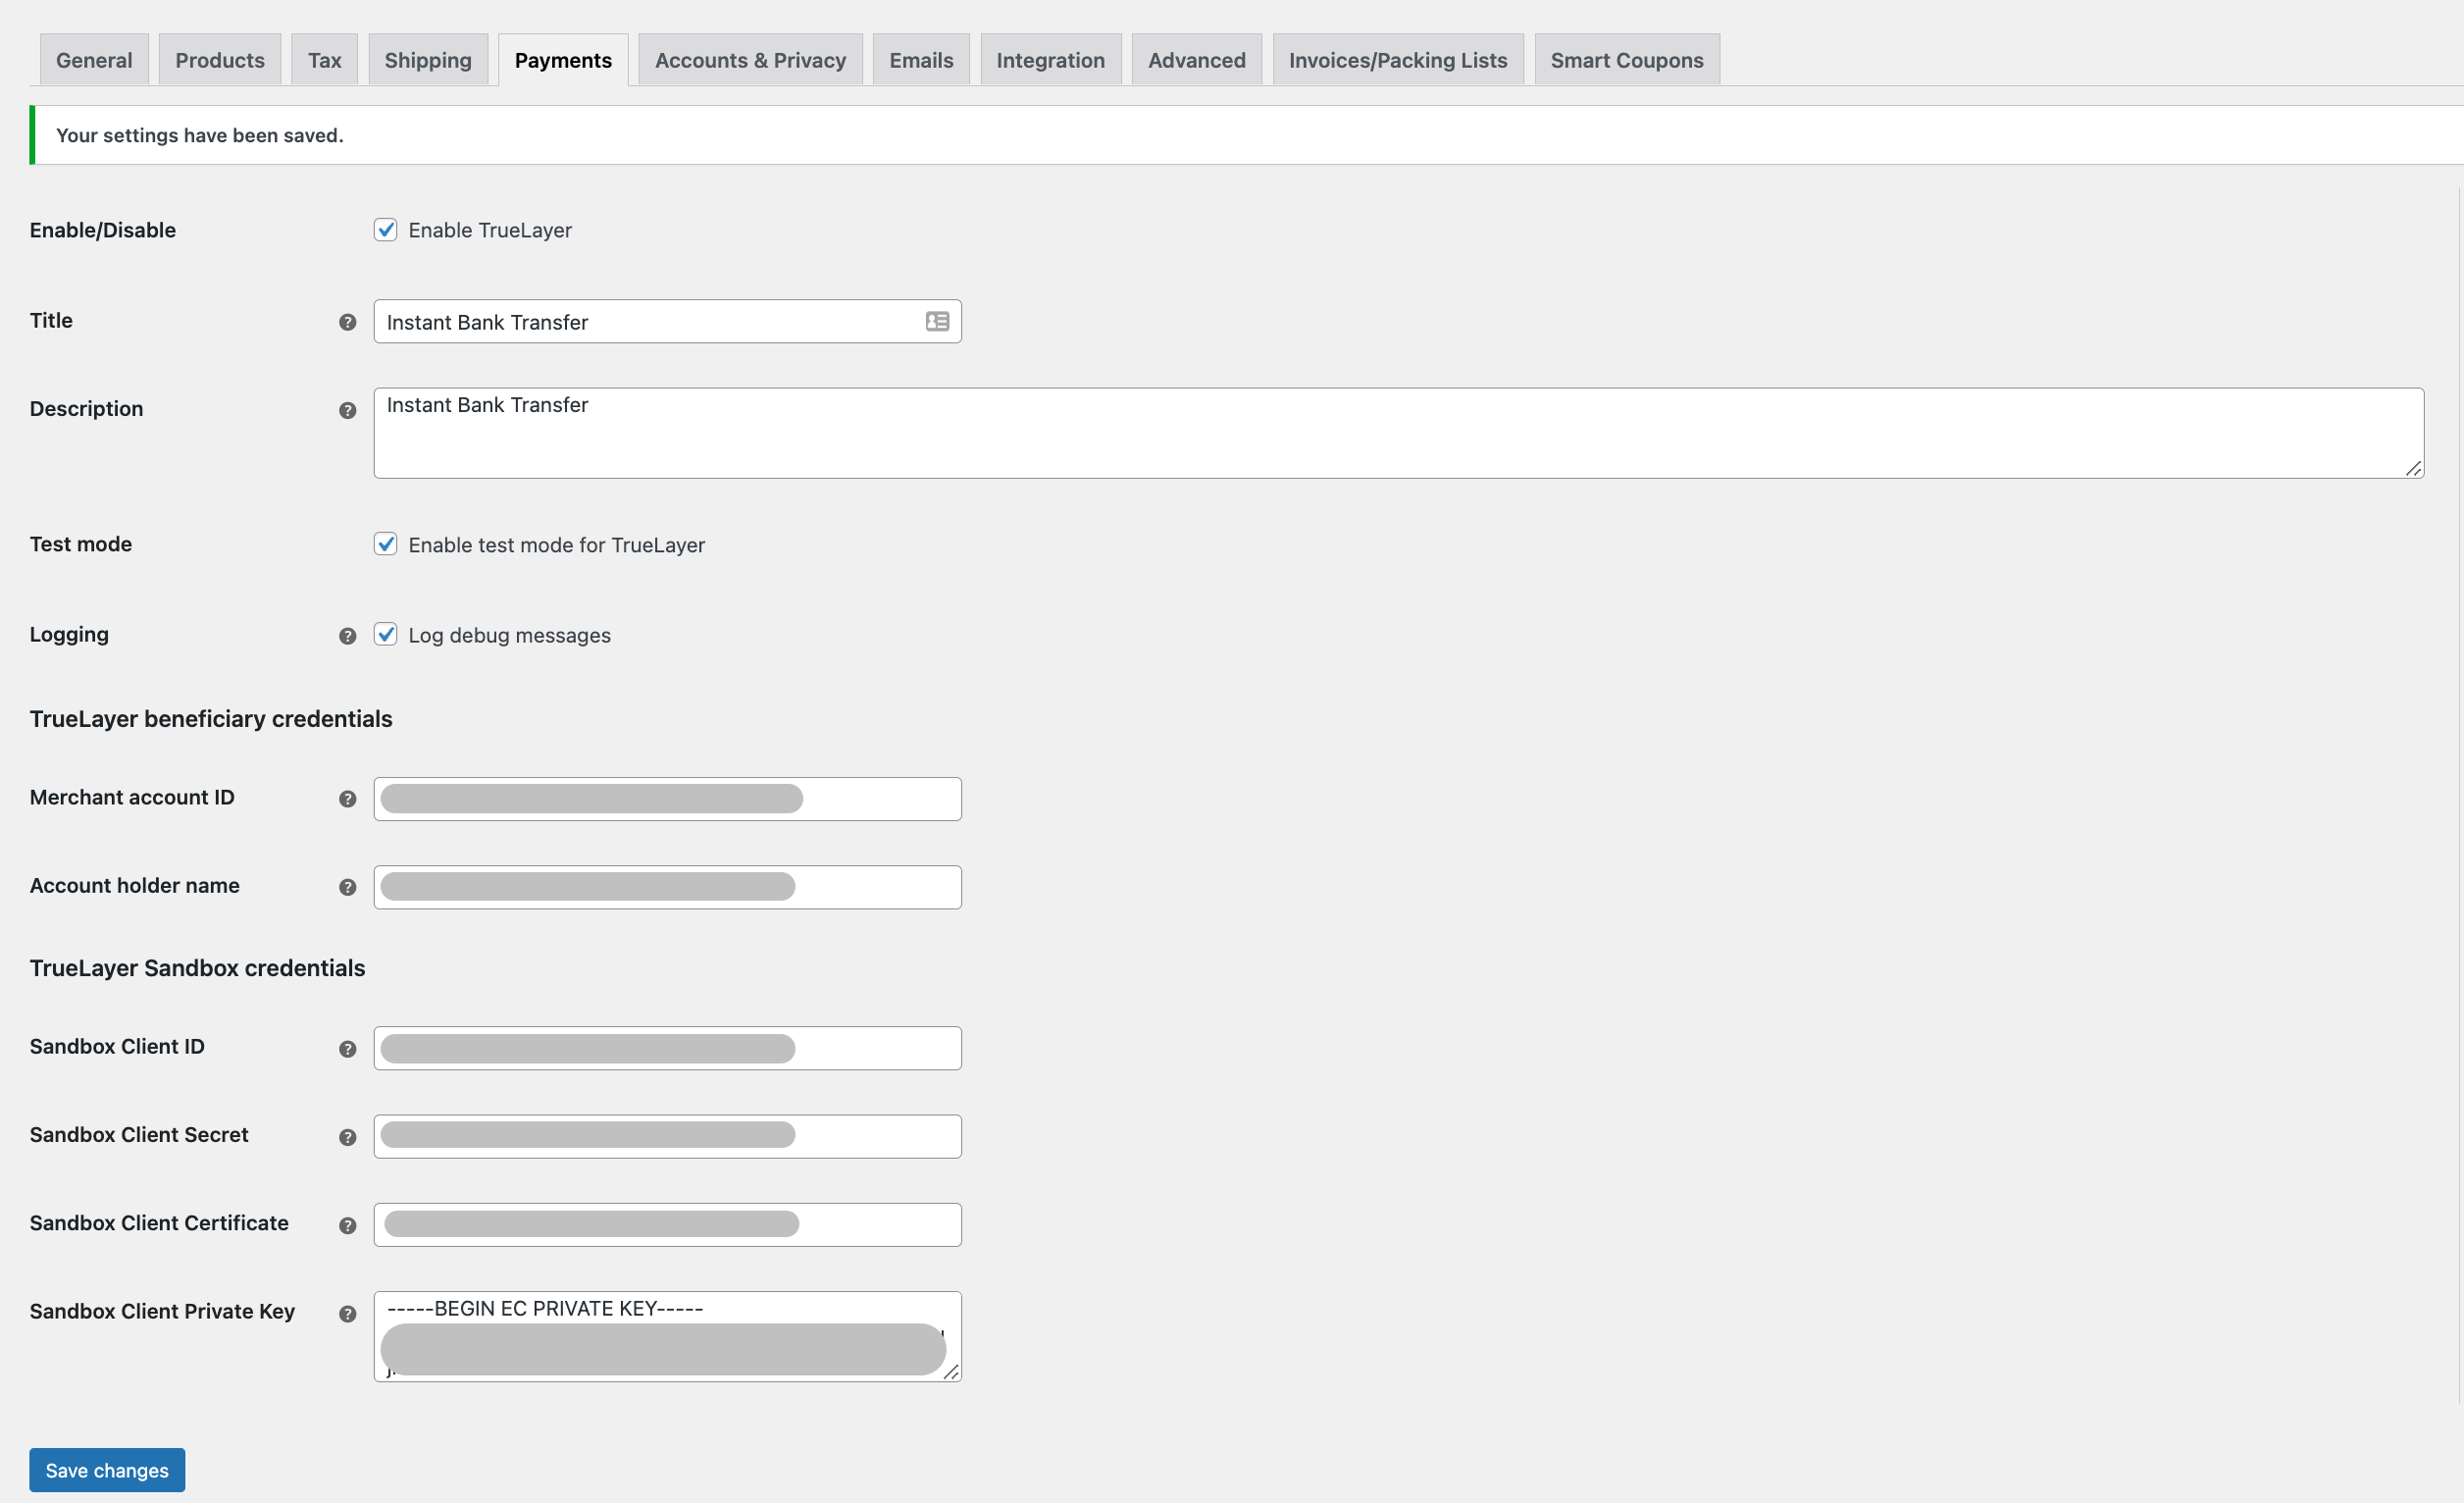
[Sandbox] Configure WooCommerce settings
Set up the WooCommerce plugin to start testing.
Enable pretty permalinks in WordPressEnsure that you enable Mpretty permalinks in your WordPress installation. Otherwise, callbacks from TrueLayer back to your store won’t work and orders will not be updated with the correct order status/information.
Install and configure the TrueLayer plugin in WooCommerce, so that you can start accepting payments.
Before you start
This guide assumes that you already have:
- a Console account and client credentials
- a TrueLayer merchant account
- the correct webhook and redirect URIs for your webshop, uploaded to Console
- signing keys
You need to set these up before you start working with the plugin itself.
1. Install the plugin
First, download and activate the TrueLayer for WooCommerce plugin.
- Download the latest truelayer-for-woocommerce.zip.
- Go to: WordPress Admin > Plugins > Add New and Upload Plugin.
Upload the truelayer-for-woocommerce.zip file. - Click Install Now and then Activate.
At this stage, if you are testing payments for the first time, we recommend that you start with sandbox credentials.
2. Set up the plugin in sandbox
- Go to: WooCommerce > Settings > Payments > TrueLayer.
- Check the Enable TrueLayer checkbox.
- Title: Enter Pay by bank app in this field.
- Description: Enter Pay by bank app in this field as well.
- Test Mode: check the Enable test mode for TrueLayer checkbox.
This ensures that you can make dummy payments to test the plugin without any real money actually moving. - Logging: check the Log debug messages checkbox to save debug messages to the WooCommerce System Status log.
This enables you to monitor transactions. If an error occurs, a detailed record of the error displays here. - Fill in the fields under TrueLayer beneficiary credentials and TrueLayer Sandbox credentials with the corresponding information in Console. See below for where to find that information:
| Field | Where to find it | Example value |
|---|---|---|
| Merchant account ID | Payments > Merchant Account > Details | 363aglc4-1451-4089-b143-c2ad0e237322 |
| Account holder name | Payments > Merchant Account > Details | My Shop Name |
| Sandbox Client ID | App Settings > Identifiers (sandbox client credentials always begin with sandbox-) | sandbox-ecommerceplugins-1109e0 |
| Sandbox Client Secret | On your device (wherever you stored it when you initially downloaded it) | bf945c77-b697-433c-b4f2-36dcc7e8c886 |
| Sandbox Client Certificate | Payments > Settings > Signing keys. Copy the KID using the icon. | c7d2f140-7fdd-4272-b948-23c32a613546 |
| Sandbox Client Private Key | Open the private key file with a text editor such as TextEdit. Copy the text in the file. | -----BEGIN EC PRIVATE KEY----- MIHcAgEBBEIB15zSseam7aJIM7inVjB7XL/Q3 vpw9p32d7ve15knwvNN1XfgLY4fxfQ809O5 GkbK+yS9ijQJmkRzNFPg8damR6+gBwYFK4 EEACOhgYkDgYYABADzPUKuUvSAMZ50ww rjlBeZ4XTj76B6wM0kUunmbpSqWQ2It41uM 4SNAQ5B40L0h7khq8ha8043bT/x/cOJ1bMT egBrgDXa5rOgBRdD3wfNhxI1GQTq0dw5yz4 ilCXNbJ+1ucytuUDHhx2XDaTel/bw5983g2YN DQCFbMr4sVHABCQ8dA== |
| -----END EC PRIVATE KEY----- |

- Make sure to click Save changes.
Updated about 1 month ago
