Console basics
Use Console to manage your different integrations and quickly access payments data.
Console is a back-office platform for your integration that enables you to set up and manage TrueLayer integrations. For example, you can do the following (and more):
- Generate a client ID and secret to authenticate your API requests.
- Configure a Payments API integration and monitor your merchant accounts.
- View and refund payments made to your account.
- Configure a Data API integration.
- Manage Console access in your organisation.
Organisations and apps
In Console, you work within applications, which represent a single payments integration. Applications are grouped within organisations, so a single business can have multiple applications in one place, for different countries for example.
Generally, the hierarchy in Console is organisation > application > users. Learn more about organisations and user management in Console.
At any time in Console, you can click your initials in the top-right corner to change the organisation you're signed into, or to set up multi-factor authentication .
Signing up to Console
To use TrueLayer products, you need to sign up to Console. When you first sign up for Console, a dialog displays that contains instructions on how to get started.
If you don't see an email from us when you sign up for Console, check your spam folder and ensure you can receive emails from the @truelayer.com domain.
Login methodsAfter you have registered, you must continue to use the same login method every time you sign in to Console.
For example, if you initially register with an email and password, you cannot access the same account by linking your Google account.
Console home page
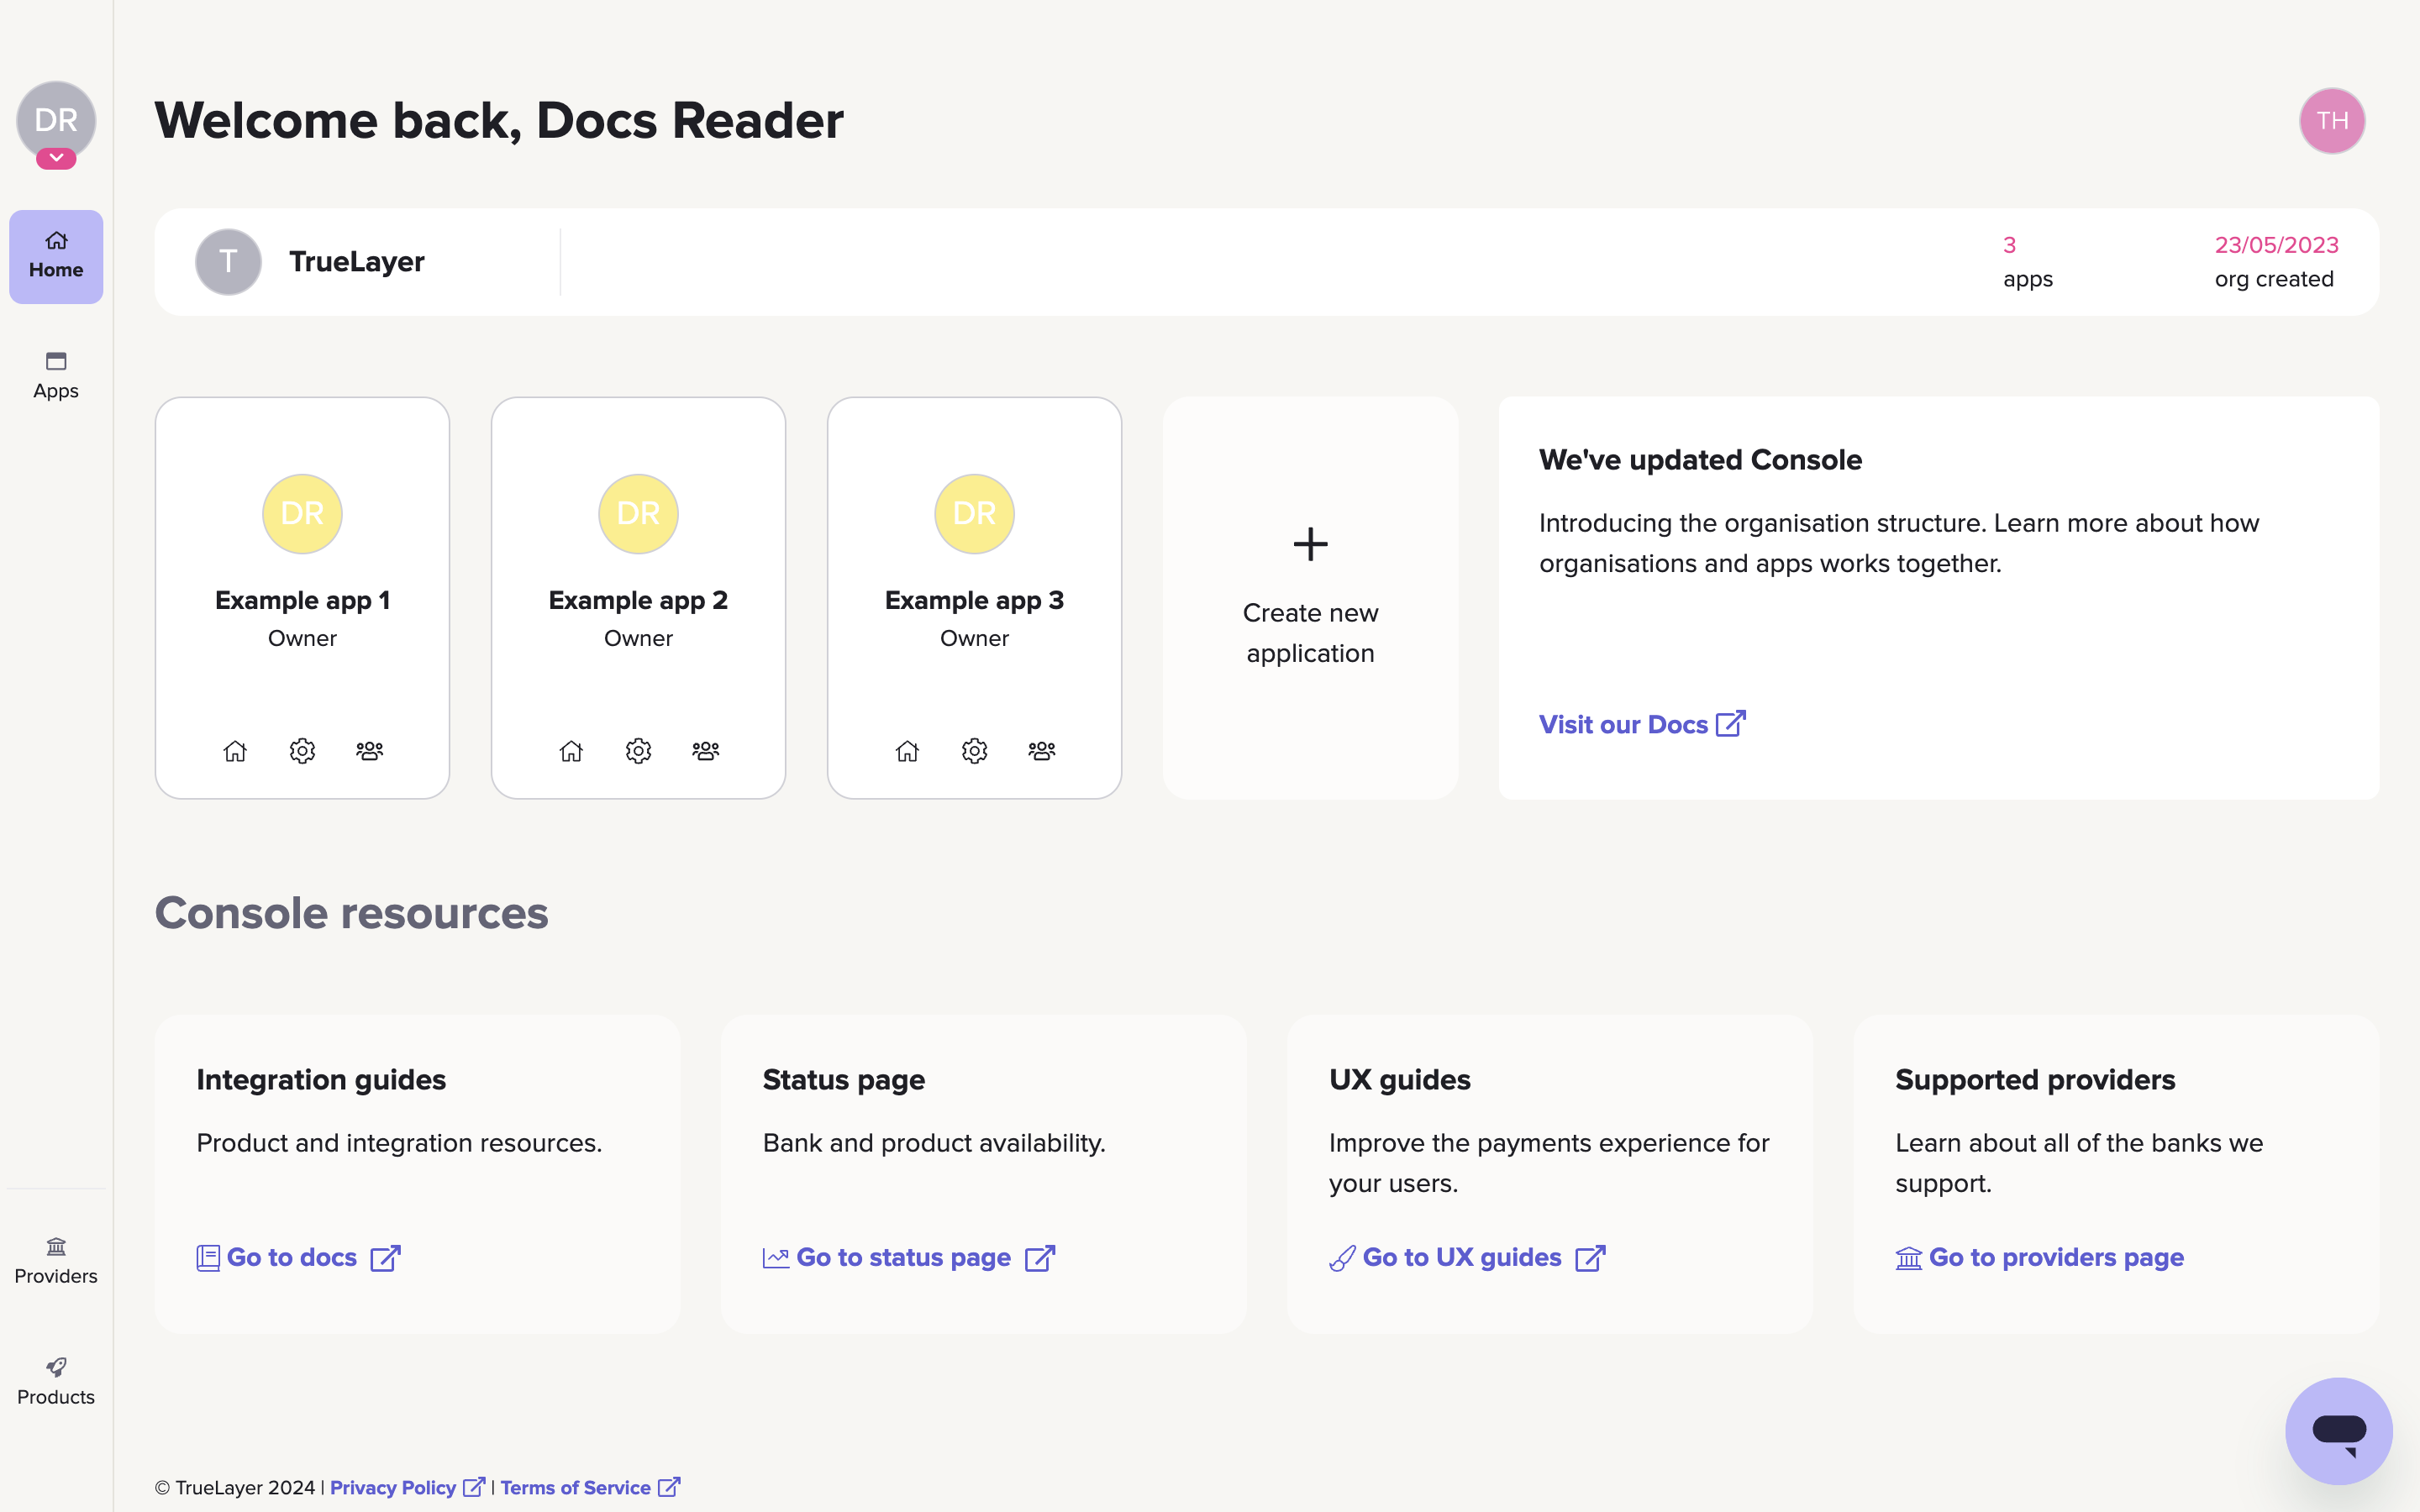
The screen that displays when you sign into Console.
If you're the owner of an organisation, you can click the edit icon next to the organisation name in the top-left corner to change the name.
The Console homepage displays the three apps you've accessed most recently. You can also click the initials of the organisation's name in the top-left corner to switch between the different organisations you have access to. The left bar contains the following options:
| Icon in menu | Description |
|---|---|
| Navigate to the Console Home page, which contains links to your three most recently accessed apps and various other information. | |
| Opens the Applications page, which contains a full list of apps you have access to within the current organisation you have open. | |
| Opens the Supported Providers page. | |
| Opens the Products page, which contains an overview of the available TrueLayer products and add-ons. |
App overview page
When you open an app from the shortcuts on the Home page, or Apps page, the overview page for that app displays.
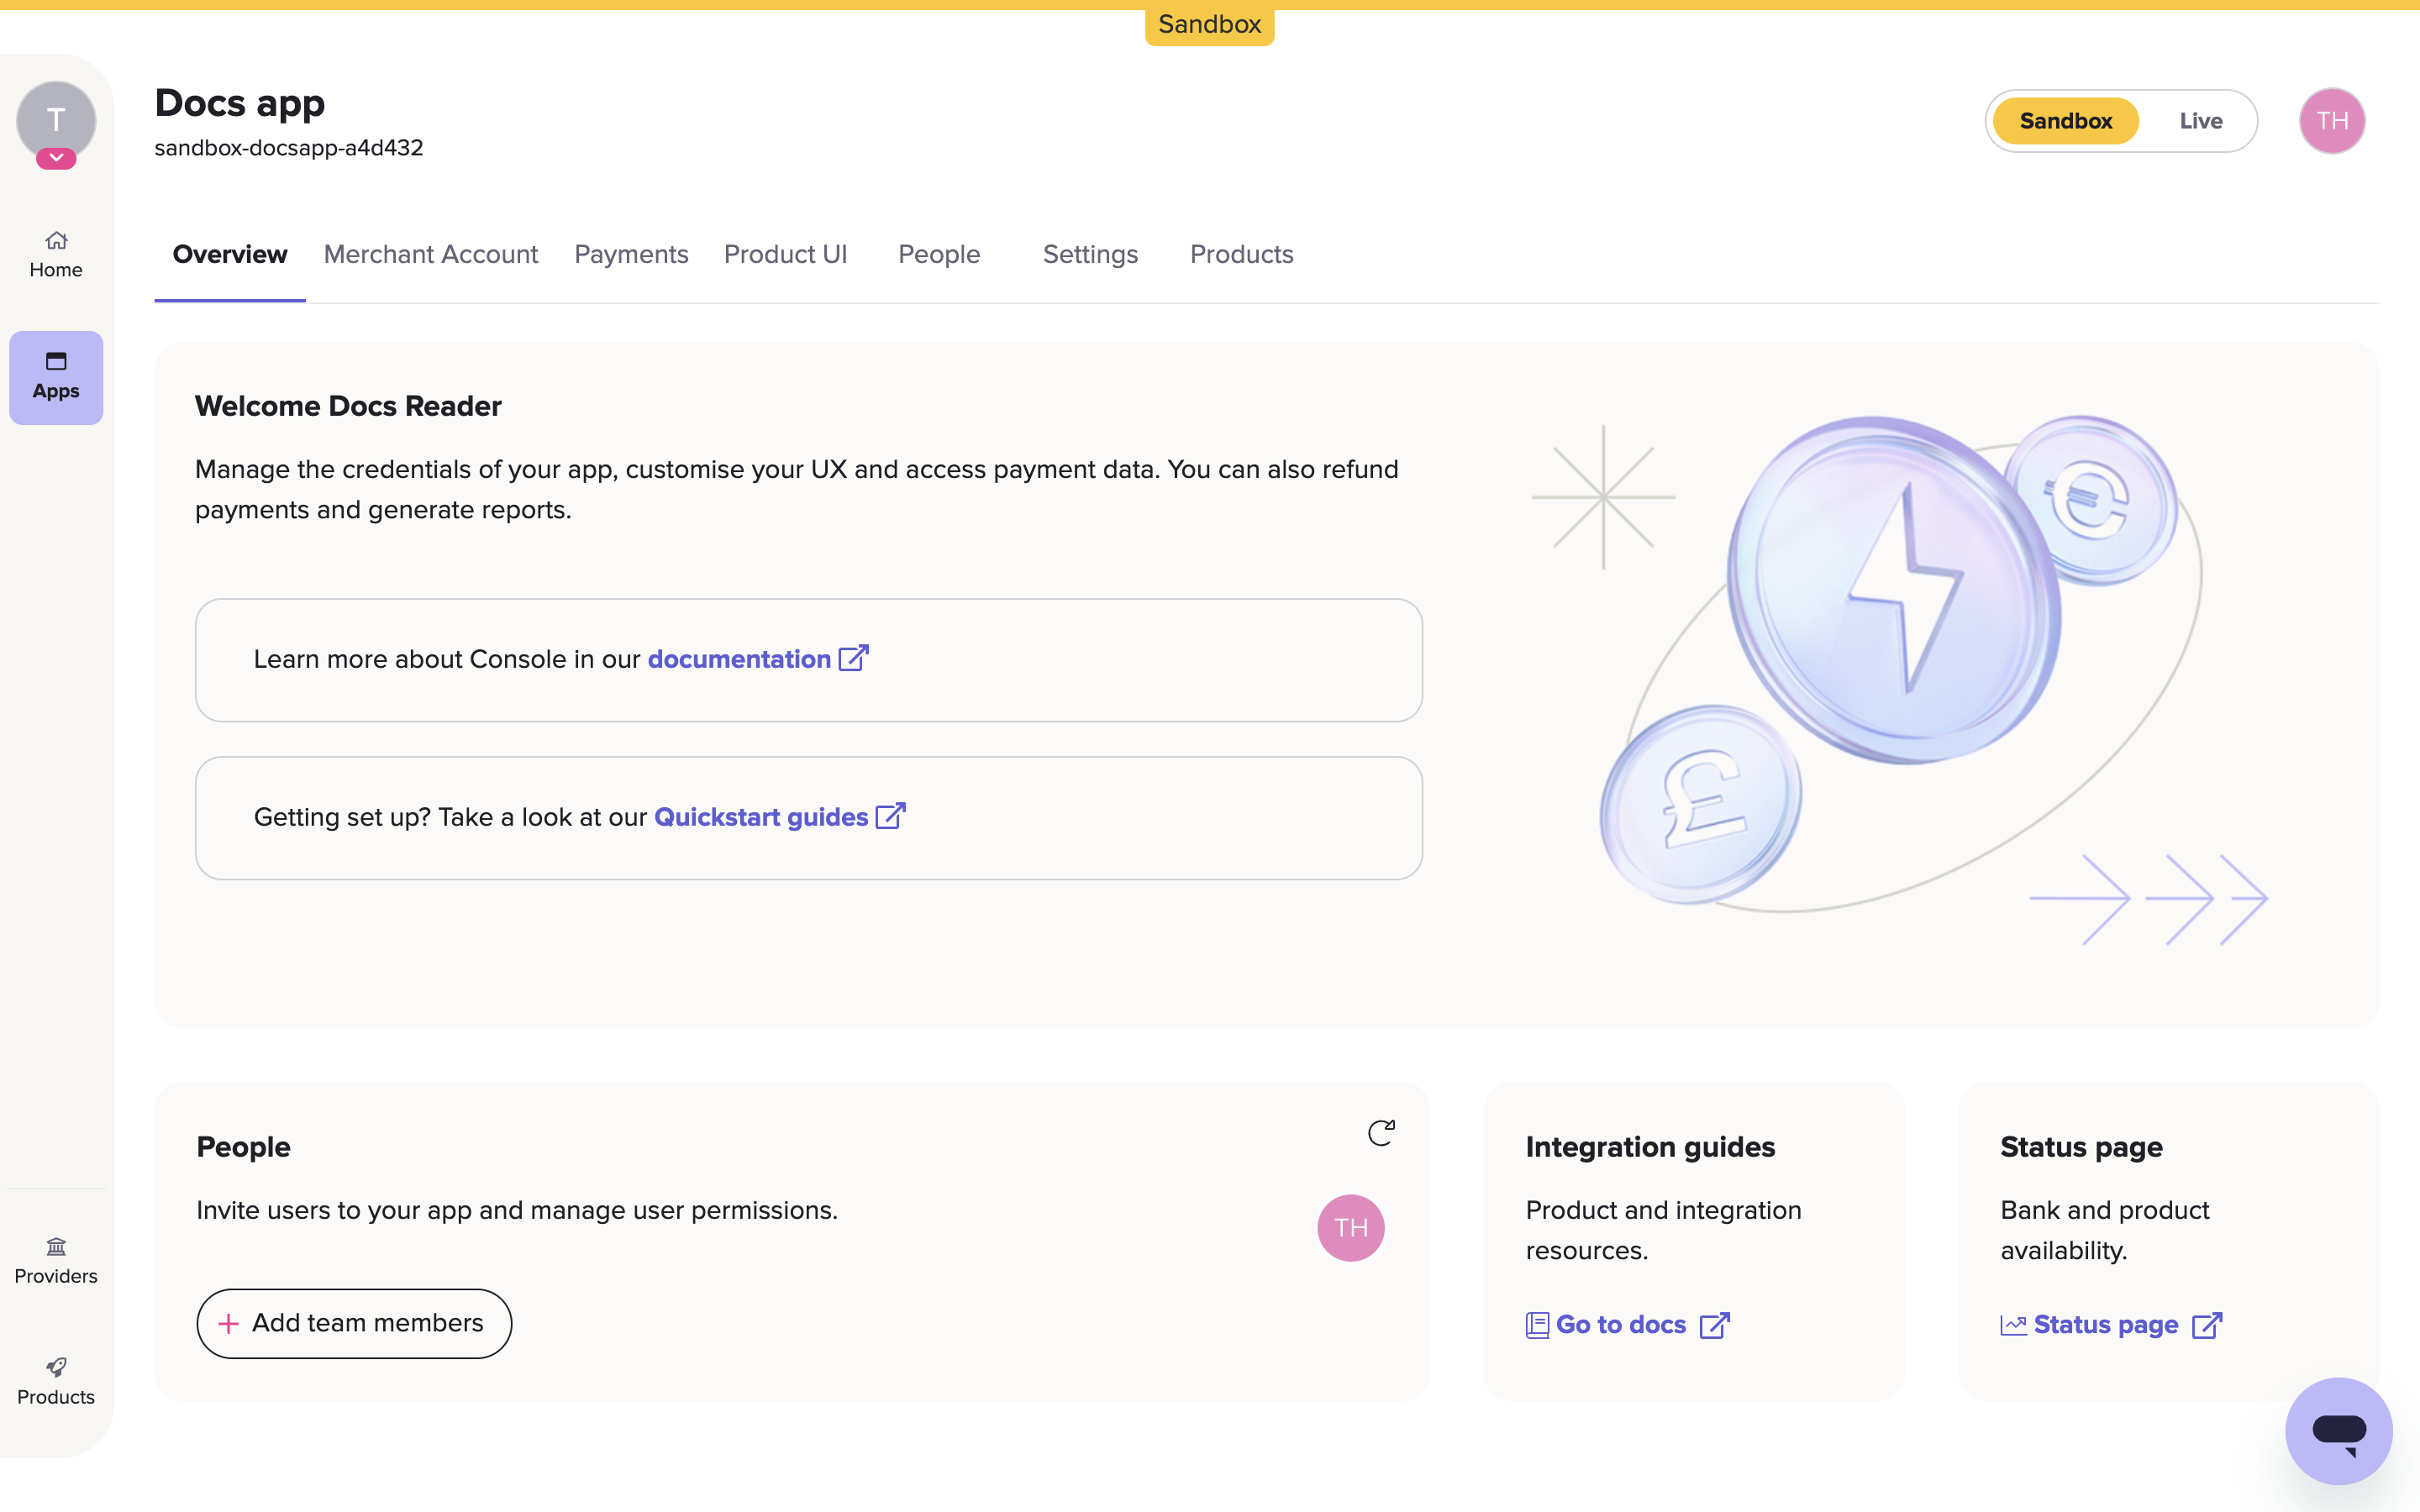
The screen that displays when you open an app.
You access most of the functionality for your app from the horizontal tab bar near the top of the page. There's also a variety of links and shortcuts, including to this docs site and to quickly add people to your application.
The tab bar contains tabs for the following functionality:
| Tab bar page | Description |
|---|---|
| Overview | Takes you to the app overview page. |
| Merchant account | Shows the balance of any merchant accounts in your app. You can also: - View and export the Historical Balances for the past day or month for each account. |
| Payments | Access the Payments view, where you can view and filter a list of payments. You can also export reports and refund payments. |
| Product UI | Takes you to a page where you can customise and preview your user interface for the Payments API, specifically the hosted payment page. If you're integrating the Data API add-on, you can customise the the auth dialog here, and also create auth links with the auth link builder. |
| People | A page that displays who is currently a member of your app, along with their role, MFA status, and the time of their last interaction. If you have sufficient permissions, you can add new members, edit an existing member's role, or remove existing users from the app. There's also a tab you can use to check on pending invites and generate links to help them sign up. |
| Settings | A range of settings and resources to help you manage your integration. On this page you can: - View your |
| Products | View a list of TrueLayer products and whether they're active. There are also links to learn more or to contact us to enable them. |
Sandbox vs Live
If you have opened an app in Console, you see a Sandbox <> Live toggle in the top-right corner. Use this to switch between the sandbox and live environments. If you're in the sandbox environment, a yellow Sandbox banner displays at the top of the screen.
In the sandbox environment, no real money is moved, so it's ideal for testing and learning about TrueLayer's APIs.
Your sandbox client_id and client_secret are different to your live credentials, and you can see them on the Settings page. The Payments view and Merchant Account dashboard contain different information for both environments also.
Updated 20 days ago