Enable TrueLayer for Magento
Set up the TrueLayer plugin and configure your settings to enable you to start accepting payments.
This guide assumes that you have already set up your TrueLayer account in Console. If you haven't, take a look at our Console configuration docs to learn how.
Video guide: configure public and private keys
Before you start
This guide assumes that you already have:
- a Console account and client credentials
- a TrueLayer merchant account
- the correct webhook and redirect URIs for your webshop, uploaded to Console
- signing keys
You need to set these up before you start working with the plugin itself.
Start in sandboxBefore moving any real money, make sure to test payments using sandbox credentials first. Check that General > Mode is set to Sandbox.
To access your Sandbox credentials in Console, ensure that the Live toggle in the top right is set to off.
1. Install the plugin using Composer
To install the plugin:
- Download the latest TrueLayer Payments for Magento plugin from GitHub.
Or enter the command below in the command line of your root:
composer require truelayer/magento2- Connect to your Magento 2 store.
- Clean the cache.
- Deploy the content in your Magento environment using this command in your command line:
php bin/magento setup:upgrade
php bin/magento cache:clean
If Magento is running in production mode, deploy the static content below:
php bin/magento setup:static-content:deploy- Go to your Magento admin portal. Navigate to Stores > Configuration > Sales > TrueLayer.
2. Configure your settings in Magento
- In TrueLayer, go to General.

- Enter the credentials in the table below.
| Credential | Example value | Where to find it |
|---|---|---|
| Merchant account ID | 363aglc4-1451-4089-b143-c2ad0e237322 | Console > Payments > Merchant Account > Details |
| Client ID (sandbox) | sandbox-ecommerceplugins-1109e0 | Console > Settings |
| Client secret (sandbox) | bf945c77-b697-433c-b4f2-36dcc7e8c886 | Console > Settings > Saved to your desktop as a .txt file upon generation |
| Private key (sandbox) | ec512-private-key.pem | On your device |
| KID (sandbox) | c7d2f140-7fdd-4272-b948-23c32a613546 | Console > Payments > Settings > Signing keys |
- In the Title field, enter the text Pay by bank app.
- If you want to send an email to your user when they complete an order, toggle on Send Order Email.
- If you want to send an email to your user with invoice details, toggle on Send Invoice Email.
- Enable Debug Mode under Debug & Logging.
This ensures that both you and TrueLayer receive useful information if an error occurs. - Select Save Config. This saves your configuration in its current state, and enables you to check your credentials.
Optionally, click Check credentials to ensure that your client credentials are valid. This function does not check your private key and KID.
[Optional] Set UI colours
To change the colours of the payment authorisation UI, go to Stores > Configuration > Sales > TrueLayer.
Scroll down to Hosted payment page settings. In this section are the Primary Color, Secondary Color and Tertiary Color options. Click each of the coloured bars to choose a colour from the picker, or enter its corresponding hex code.
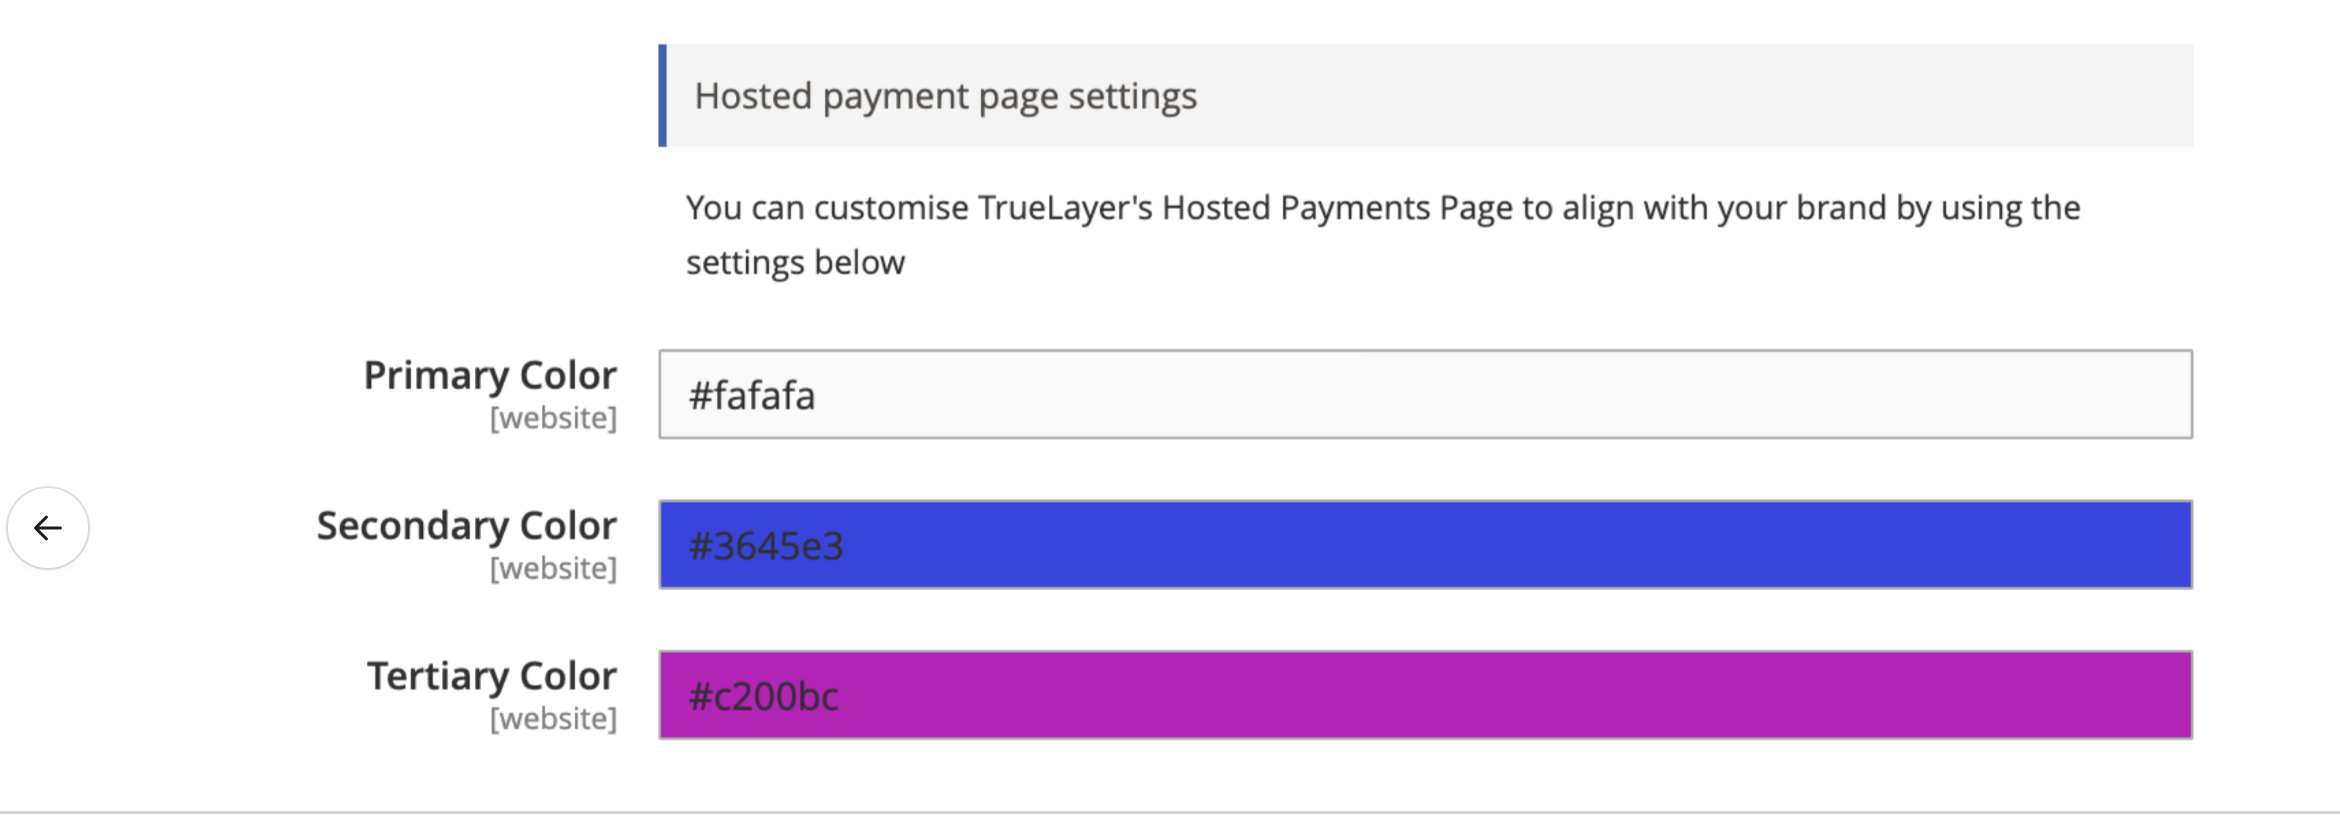
The colour picker in the TrueLayer settings menu.
3. Switch to live
To switch to live, go to Stores > Configuration > Sales > TrueLayer > General and use the dropdown to switch the Mode to Live.
You will need to use different client credentials and keys for live mode.
Updated 6 months ago