Build a Data auth link
Use the auth link builder in Console to test and build the authorisation flow for your users.
For end users to share their financial data with you, they have to:
- Consent to sharing their data
- Select and log in to the banking provider to share data from
Your users do this via an auth link. You can build a preview auth link within your app in Console.
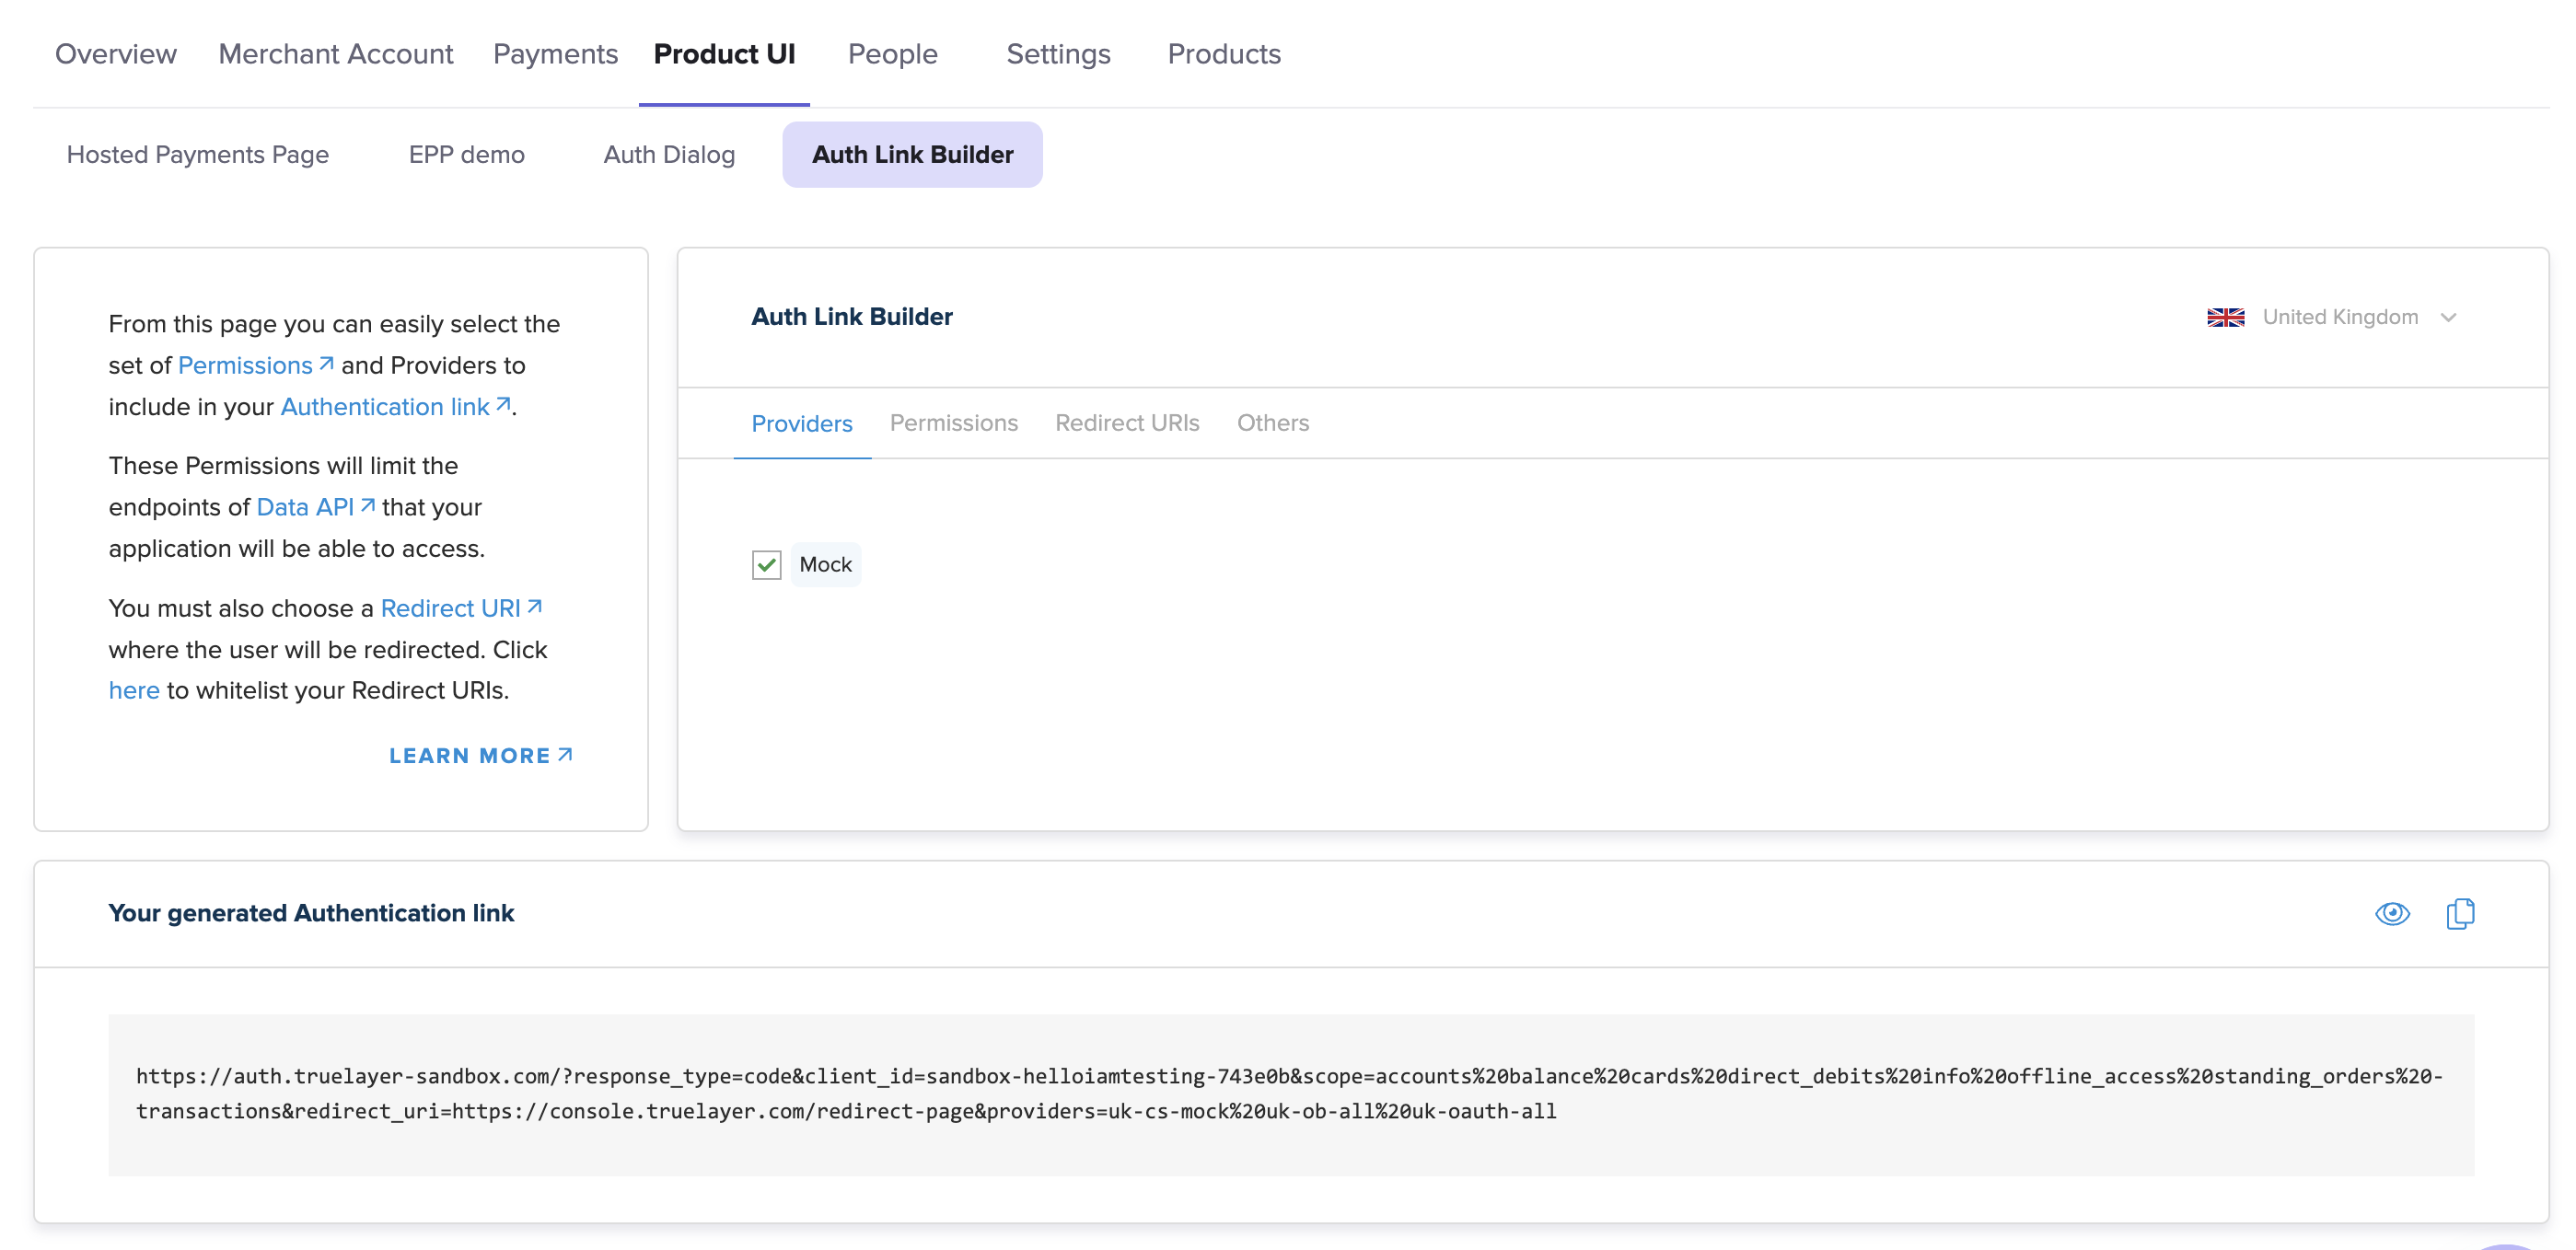
The auth link builder tool within Console, with a complete preview of the auth link at the bottom of the screen.
When you customise your auth link on this page, the Your generated Authentication link section at the bottom of the page dynamically updates to show the structure of the link with the parameters you currently have selected.
Configuration options
Use the country dropdown in the top-right to toggle between different countries. The rest of the options (Providers, Permissions, Redirect URIs and Others) are contained within tabs.
Some options are only available in the live environment. For example, in the sandbox environment, you can only select the United Kingdom as a country and the only available provider is Mock. The Providers tab changes in the live environment to reflect the types of providers that are available.
Country dropdown
Use the country dropdown to switch between different countries to enable providers for in your auth link. The checkboxes that appear when you switch between countries indicate which providers you can enable
The Providers you select for each country persist when you switch to a different country and select different providers. However, any settings that you select in the Permissions, Redirect URIs, or Others tabs apply to all countries.
To see this, check the query parameters in the URL under Your generated auth link.
Providers tab
In the live environment, the Providers tab displays as the Open Banking or XSA2 Banks tabs (depending on what type of providers are available for your chosen country).
Use the checkboxes in these tabs to select which providers your users can share their data from. Use the toggles at the top of the tab to select individual providers, all, or none of them.
Permissions tab
Use the Permissions tab to select the information your customers can choose to share with you. For example, information about identity, transactions, or cards.
Enable the offline_access scope if you want to receive a refresh_token during [authentication] that can be used to continue to access data after the access_token expires.
Additionally, if you have contacted us and have access to them, you can enable the signupplus and verification scopes to enable those products.
Redirect URIs tab
Use this to select the Redirect URI your user is sent to after they authorise a connection with their banking provider. You can add more redirect URIs within App settings.
Others tab
The Others tab contains the option to add the response_mode=form_post query parameter to your auth link. If you use this, the code you receive after user authentication is sent to your redirect URI as a post request (this can be useful for security reasons). You can exchange this code for an access_token.
Updated 3 months ago