Choose a TrueLayer UI
Select from one of the TrueLayer UIs (user interfaces) for your payments frontend.
When you create a payment or mandate by calling the /v3/payments endpoint from your backend, you receive in the response all the information required to authorise payments with one of the TrueLayer Payments user interfaces (UIs).
For the backend API integration, we recommend that you use the API client libraries.
These user interfaces are the frontend components that are displayed to your users. They return the list of banks that your users can choose from, display the payment information your users have to consent to, and show TrueLayer’s terms and conditions.
There are three UIs to choose from:
- Web SDK
- Hosted page
- Mobile SDKs
They enable your user to:
- select their bank on a provider selection screen
- consent to the specific terms of a payment, including the amount, currency and beneficiary, along with TrueLayer’s terms and conditions
- log into their bank with their credentials to consent to the payment.

An example payment authorisation flow including a provider selection screen, consent screen and bank redirect.
For the Web and Mobile SDKs, the authorisation screens are embedded in your site or app, and hosted in your domain. If you are using the hosted page, those screens are hosted on our domain.
All of our UIs are compliant out of the box, and we continuously update them with no change to the integration required. They are designed to maximise conversion.
Asset libraries and UX guidelinesPrisma is the TrueLayer design system. Go to the Prisma site for everything you need to create seamless payment flows for the best user experience.
Example flows for every TrueLayer UI are available on request, with options tailored to your specific vertical.
The diagram and table below are designed to help you choose the right integration method.

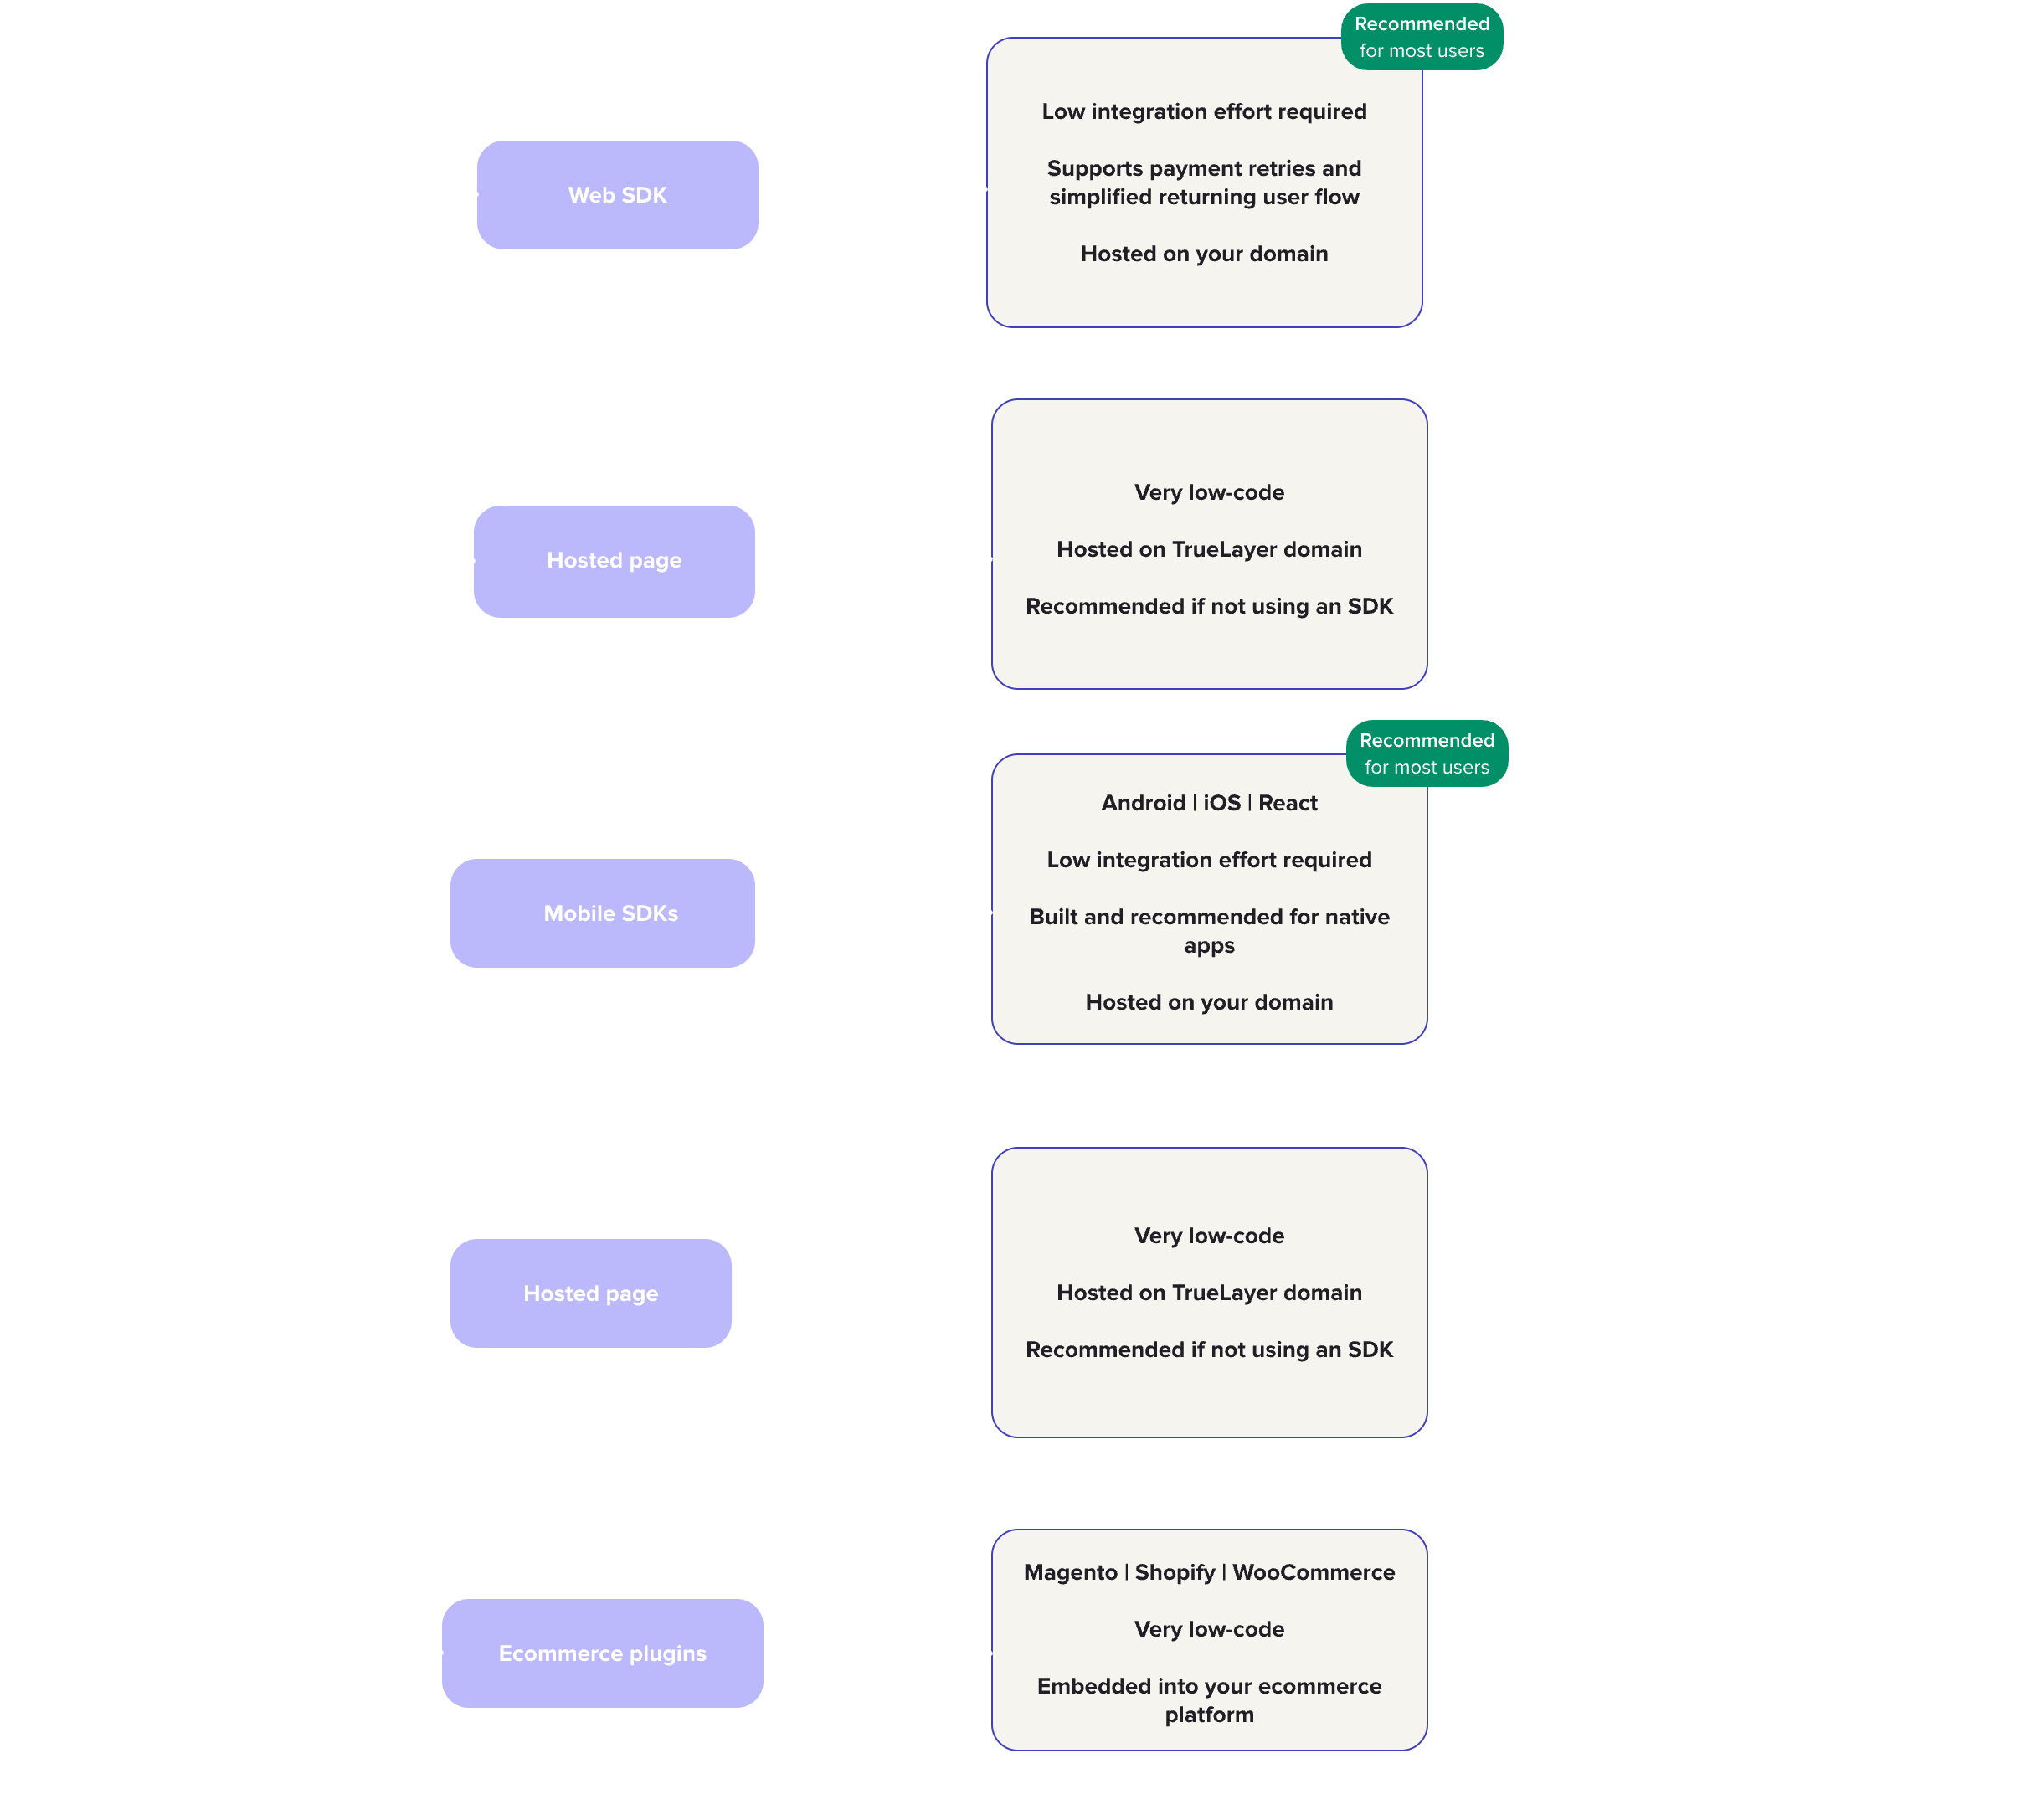
Below is a guide to each UI, including which components are compatible with which products.
| Web SDK | Hosted page | Mobile SDKs (Android, iOS, React) | |
|---|---|---|---|
| Which platforms is this for? | Desktop or mobile | Desktop or mobile | Mobile |
| Hosting | Embedded in your site or app | TrueLayer hosted | Embedded in your site or app |
| Available countries | UK, Ireland, France | Everywhere | Everywhere |
| Why choose this UI? | This experience is designed to maximise conversion, features the best end user experience, and supports the latest payments features. You can implement this payment method by embedding a payment button into your checkout. | This UI is created using a unique URL per payment, and therefore requires very low effort to adopt. | All the features of the web SDK to be included as a native component for iOS, Android and React Native. |
| Are payment retries supported? | Yes | Yes (in the UK) | Yes |
| Seamless simplified user experience for returning users? | Yes | Yes | Yes |
| Can users go back to select a different bank without restarting the payment journey? | Yes | No | Yes |
| VRP supported? | No | Yes | Yes |
| Signup+ supported? | Yes (in the UK) | Yes | Yes |
| Available languages | DE, EN, ES, FI, FR, IT, NL | EN, FR, DE | DE, EN, ES, FI, FR, IT, NL |
Fallback mechanismYou can integrate the Web SDK in any country (UK or EU).
However, the newest UI is currently supported in the UK, France and Ireland only. In other geographies, the SDK automatically falls back to an earlier UI.
Web SDK
The Web SDK is our latest authorisation UI, optimised for maximum conversion and the best user experience. The UI is embedded in your site or app (under your domain).
When you use the Web SDK for authorisation, customers stay on your domain, and are shown embedded authorisation screens when they’re ready to complete their purchase. A user consents to the payment and completes the transaction on your webpage so they don’t need to be redirected back to your site.
Part of the Web SDK is a dynamic button at checkout, which also displays the most relevant banks to your users based on the banks they've used previously and the market that they are in.
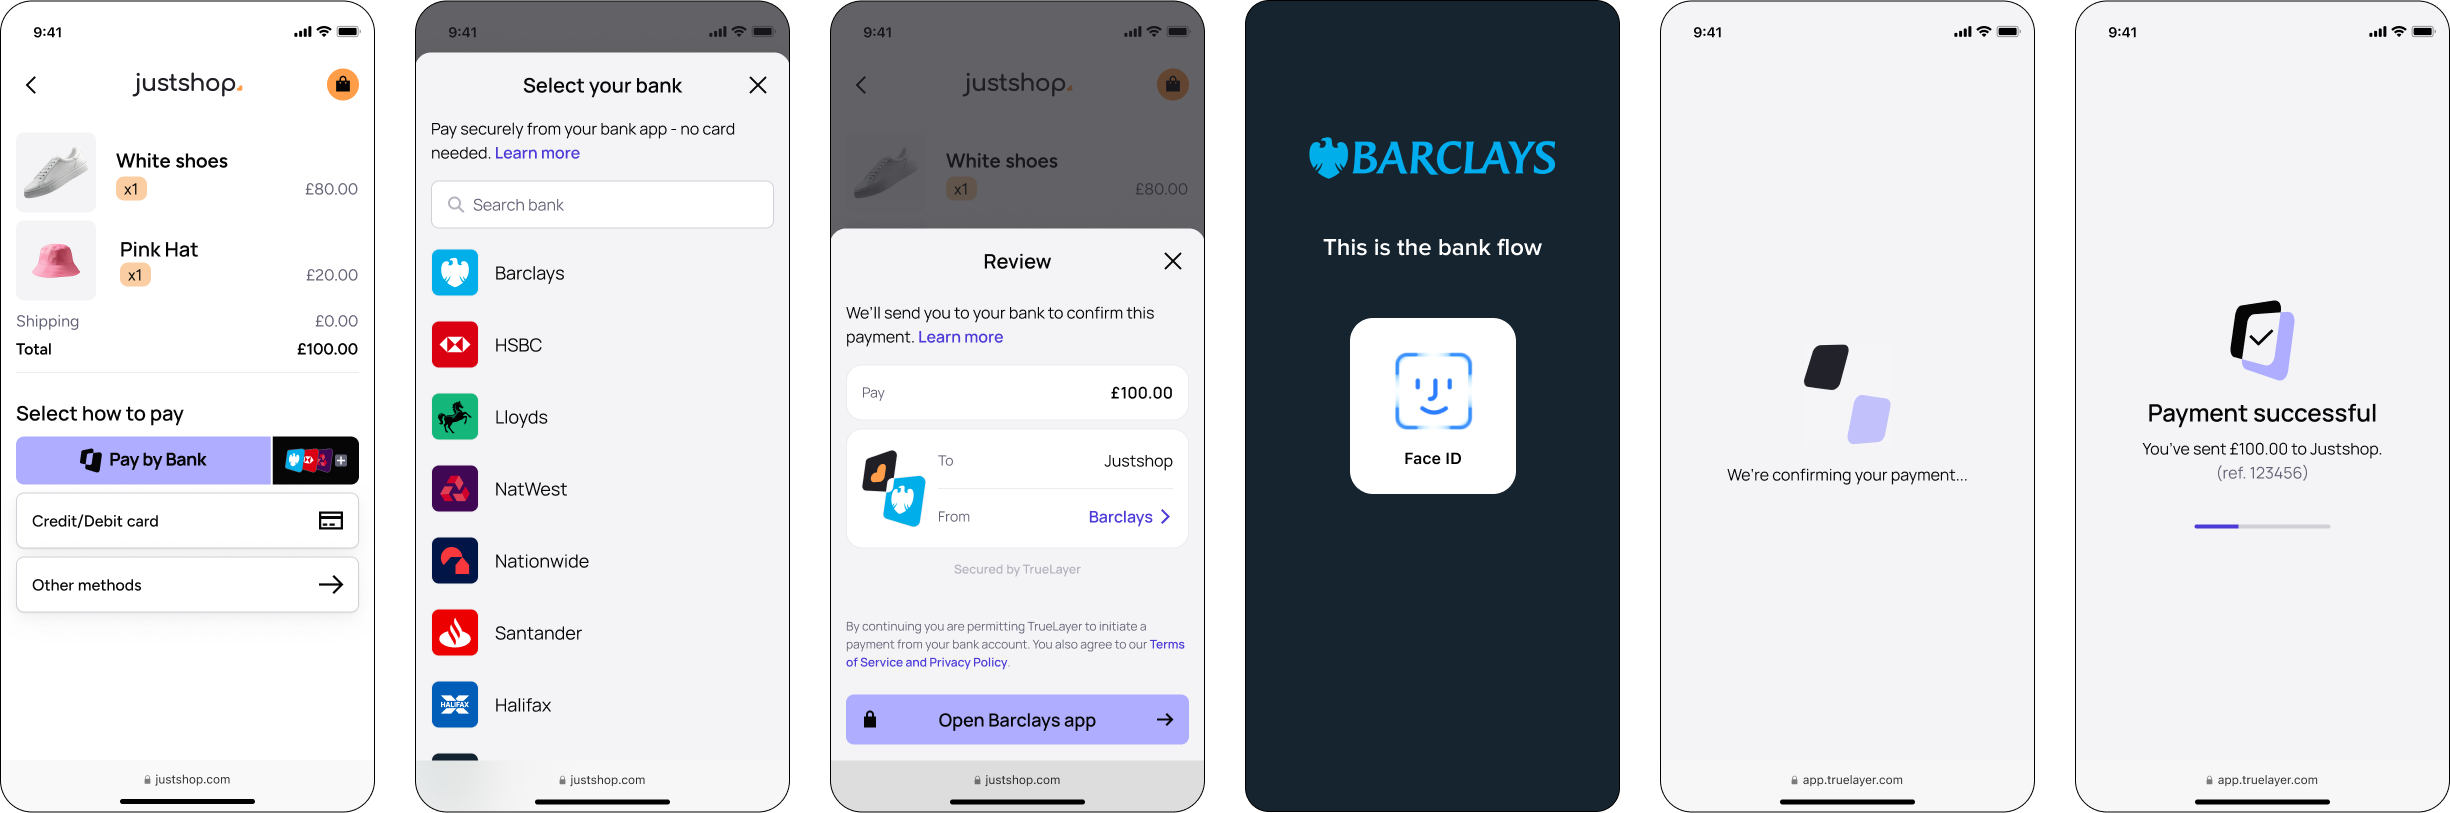
An example payment authorisation flow.
Note that the Web SDK does not support VRP, and only supports Signup+ in the UK.
Mobile SDKs
TrueLayer offers mobile SDKs for Android, iOS and React.
They present native screens that allow your user to select their bank and consent to the payment or mandate. Then, they redirect users to their banking app or website for authorisation.
The Mobile SDKs are embedded as a native component into your native iOS, Android or React Native mobile app.
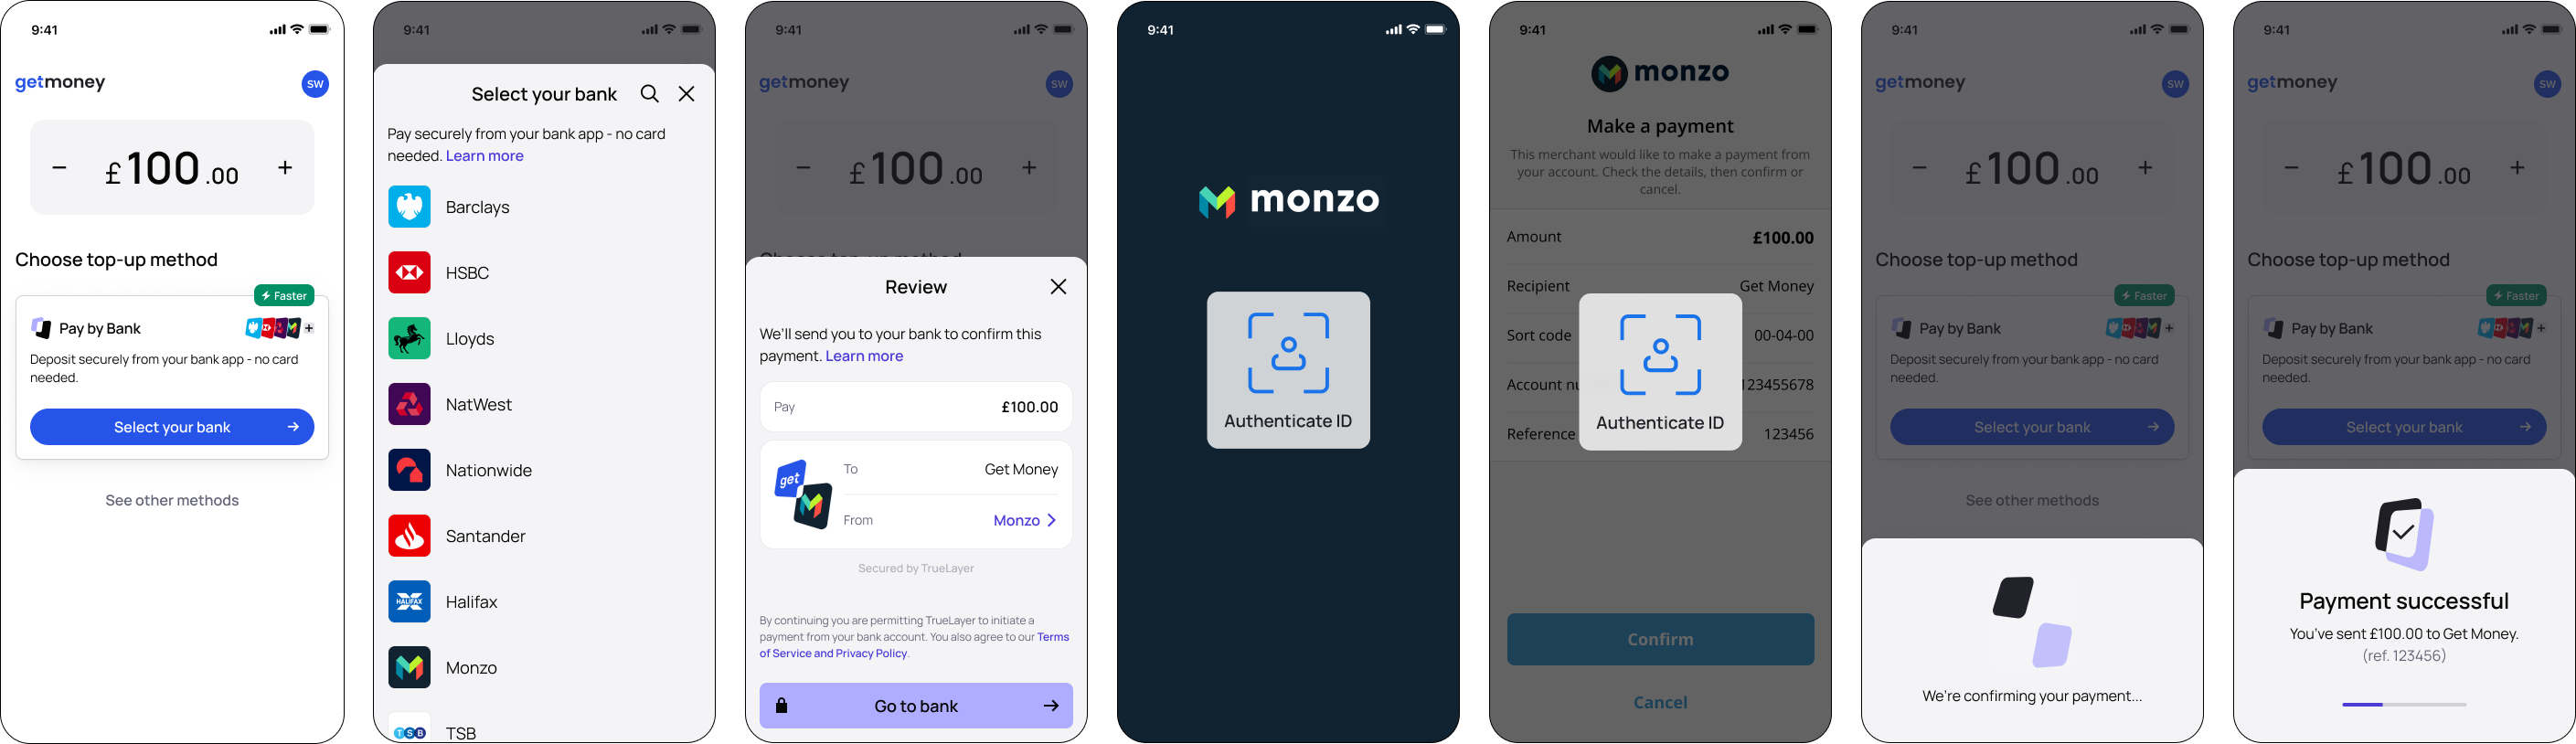
Example of the Mobile SDK user flow.
Android
The SDK is designed to work with Android 7.0 (API level 24) and above. It is currently optimised for the UK, Ireland, France, Germany, Spain, the Netherlands, and Lithuania.
iOS
The SDK is currently optimised for the UK, Ireland, France, Germany, Spain, the Netherlands, and Lithuania.
At a minimum, the SDK requires:
- iOS 13.0
- Xcode 13
- Swift 5.6
React
The SDK requires:
- Xcode 14.x and iOS 14.0 and above.
- Android 7.0 (API level 24) and above.
Hosted page
The hosted page requires minimal integration, because it’s a webpage that you generate through a unique URL per payment. On that URL, we host a prebuilt UI that you can use for your payment journey. This flow securely collects all payment information required from your users. If you cannot integrate an SDK (Web or Mobile), then you will be using the hosted page.
After your user consents to a payment and completes the transaction, they are redirected back to your site (ie to the return_uri you specified in payment creation).
The hosted page is compatible with desktop websites, with a hand-off to mobile for user convenience. You can also use it for payment authorisation on mobile devices within a web view.
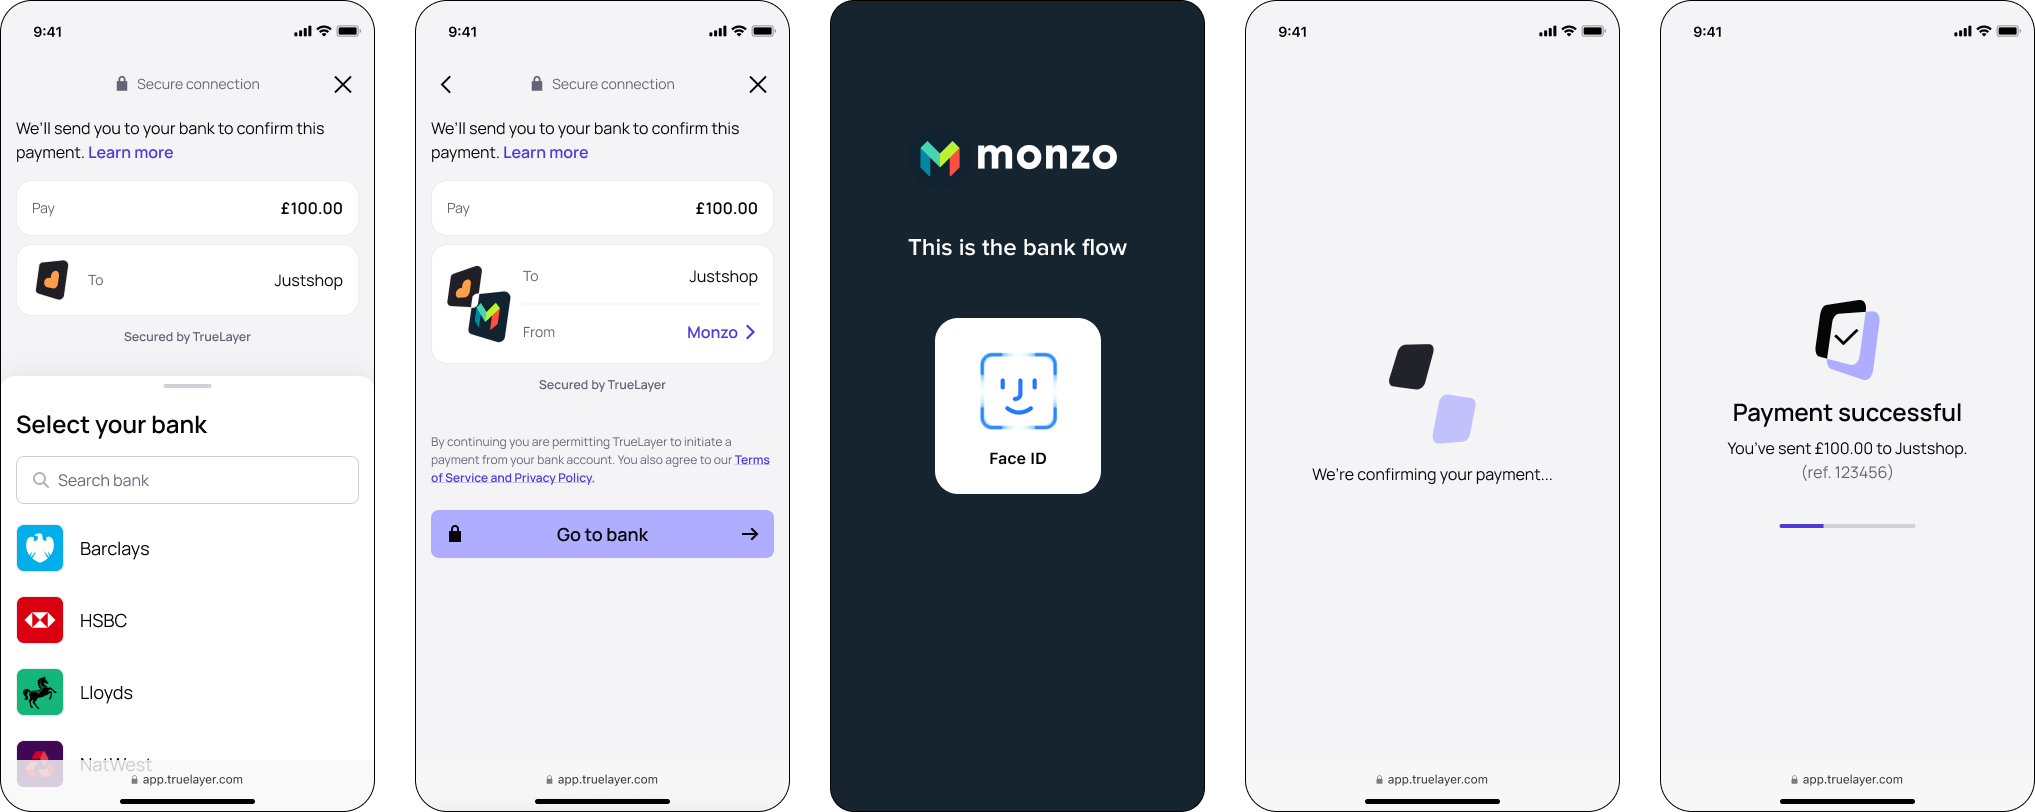
Screens from the hosted payment page flow.
Using Magento, Shopify or WooCommerce?Integrate with TrueLayer plugins for your ecommerce platform. These are very low or no-code methods to accept TrueLayer Payments in your online store.
Depending on which plugin you use, our payment screens are either hosted on our domain or embedded on yours. We support plugins in the UK only.
Go to the plugins docs for:
Updated about 1 month ago