WooCommerce configuration
Set up the WooCommerce plugin.
Enable pretty permalinks in Wordpress
Ensure that you enable pretty permalinks in your WordPress installation. Otherwise callbacks from TrueLayer back to your store won’t work and orders will not be updated with the correct order status/information.
This page outlines how to configure TrueLayer's plugin in WooCommerce correctly, so that you can start testing payments.
Truelayer plugin configuration in WooCommerce
You will need to download our TrueLayer for WooCommerce plugin and configure this in WooCommerce to begin testing and then accepting live payments:
- Download the latest truelayer-for-woocommerce.zip here.
- Go to: WordPress Admin > Plugins > Add New and Upload Plugin. Upload the truelayer-for-woocommerce.zip file you have just downloaded.
- Click Install Now and then Activate.
After your install the plugin, you need to configure it as below:
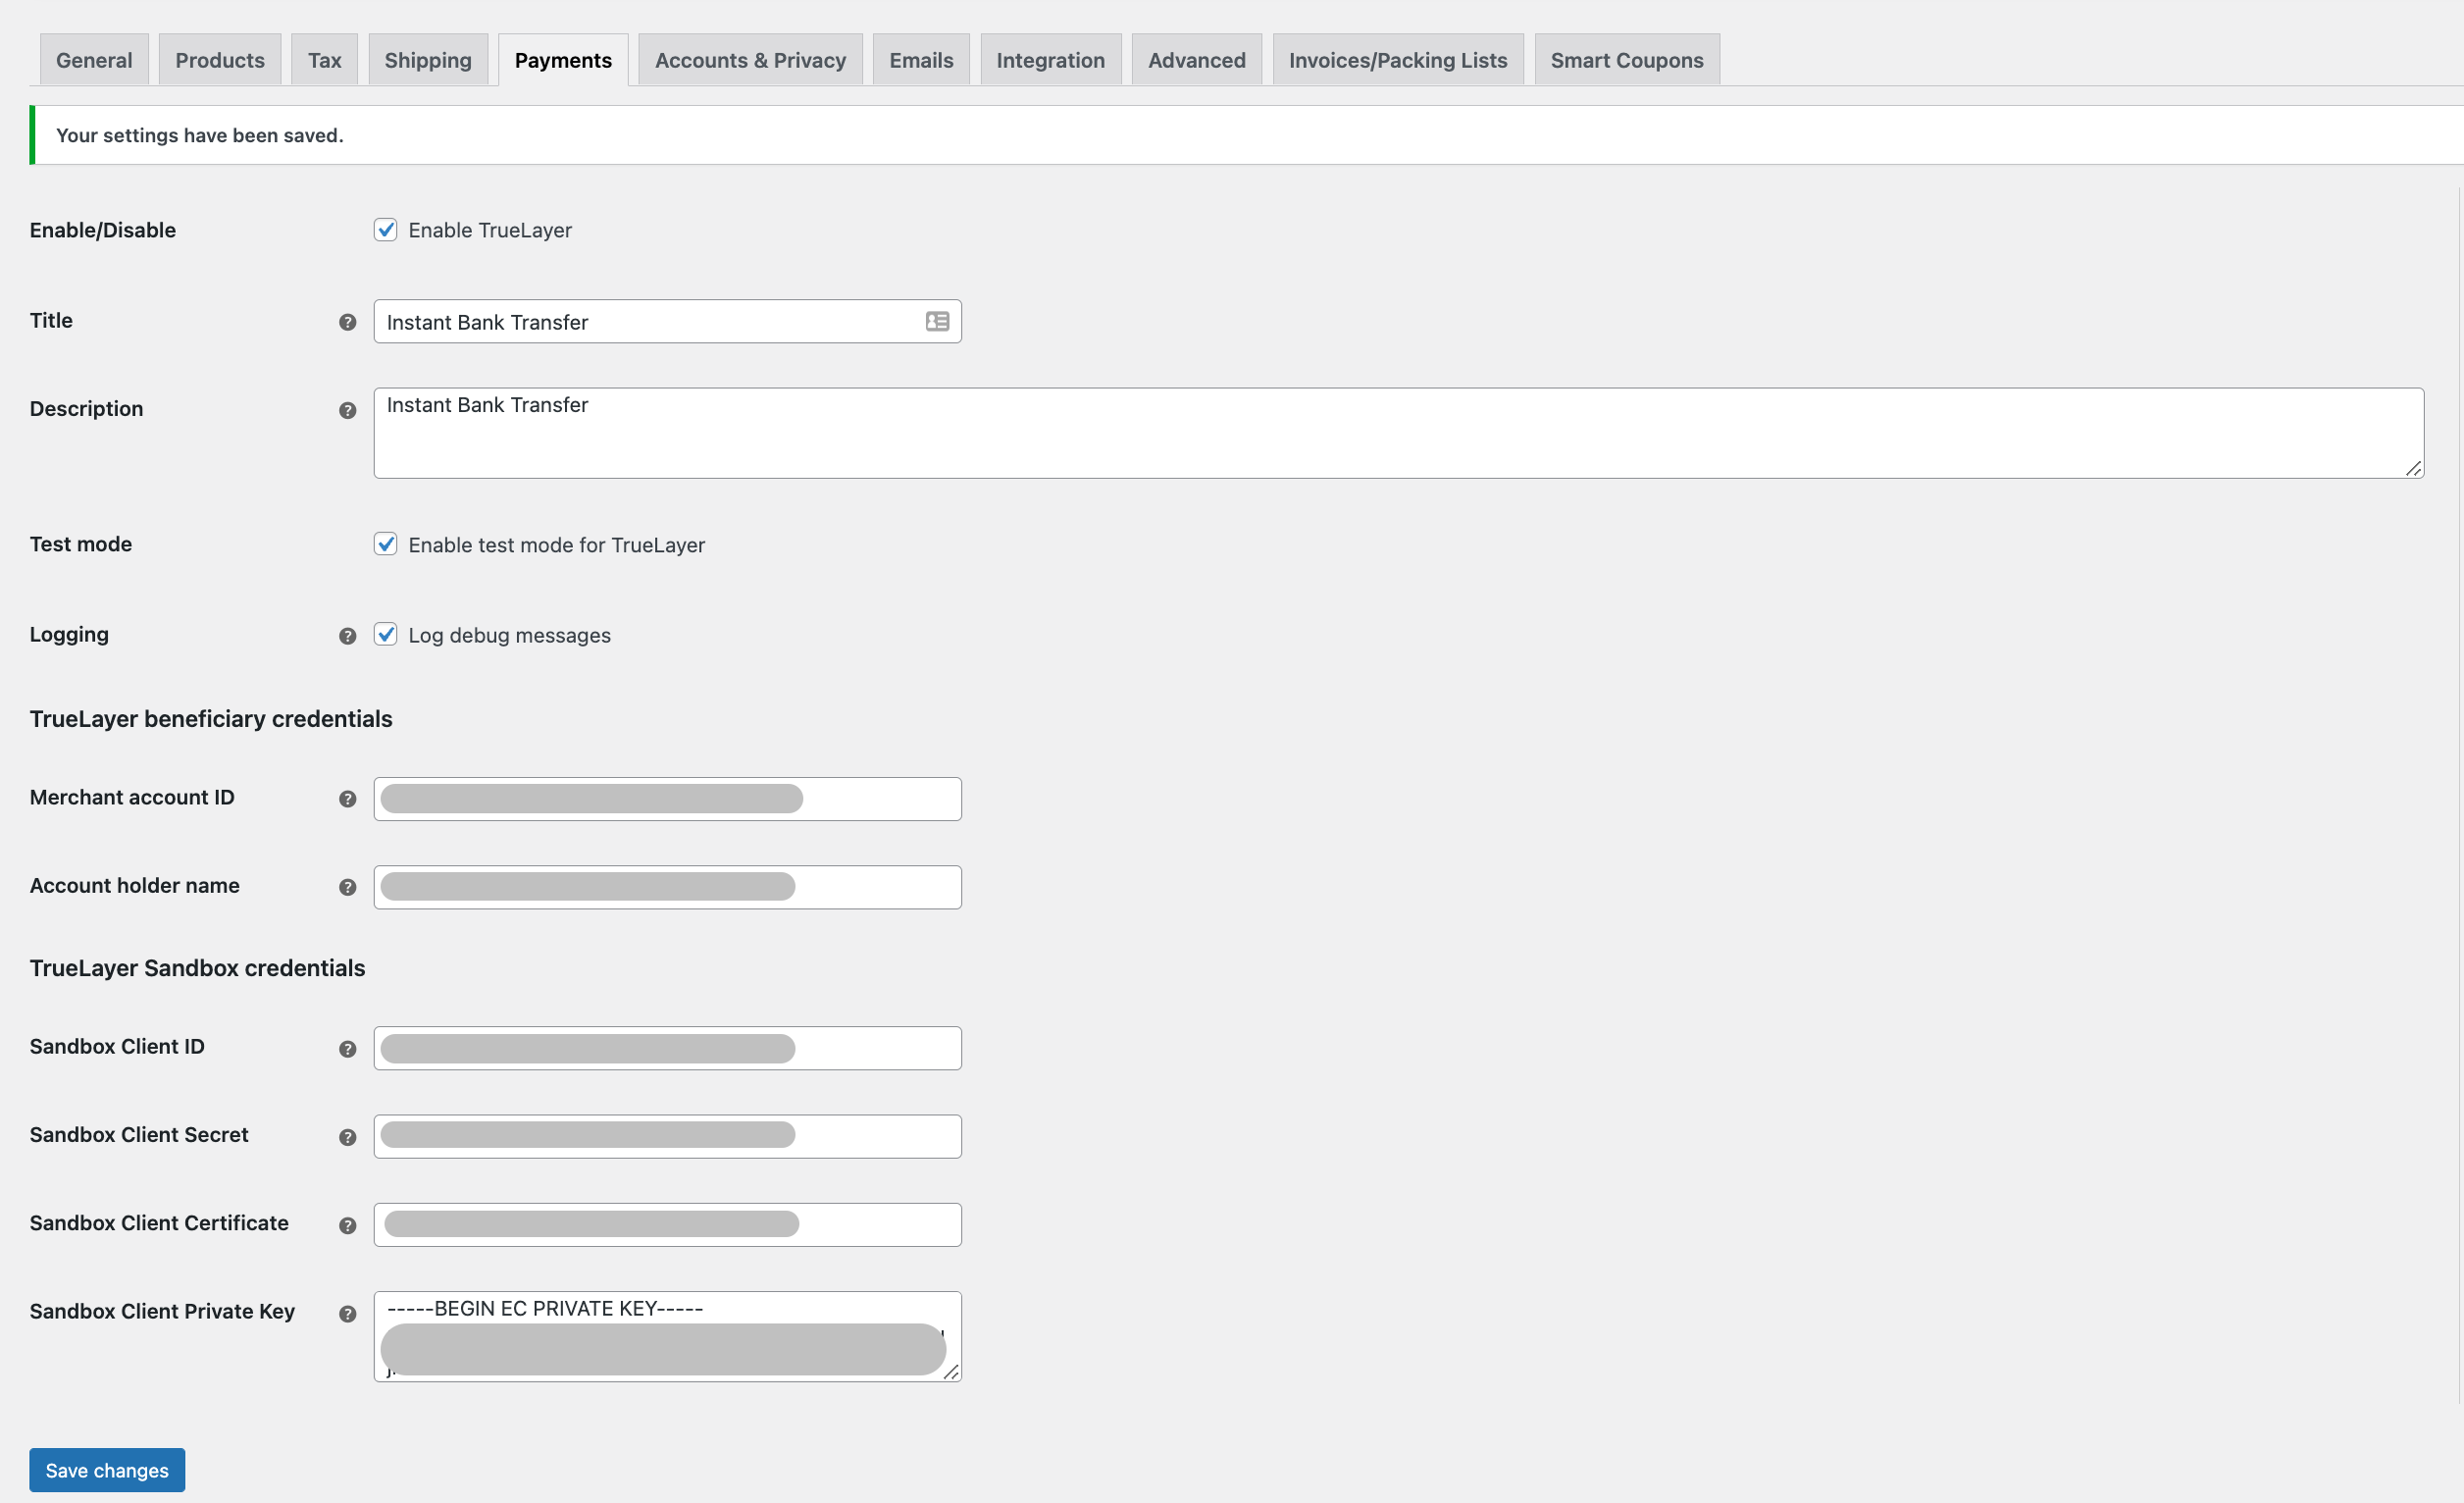
- Go to: WooCommerce > Settings > Payments > TrueLayer
- Check the Enable TrueLayer checkbox.
- Title: Enter the following title for the payment method displayed in the checkout and order confirmation emails: "Instant Bank Transfer"
- Description: Enter the following description: "Instant Bank Transfer"
- Test Mode: check the Enable test mode for TrueLayer checkbox to place the payment gateway in test mode when using Sandbox credentials. If not checked, the payment method will function in a live production environment.
- Logging: check the Log debug messages checkbox to save debug messages to the WooCommerce System Status log. This provides you with transaction monitoring and provides a detailed record if an error arises.
- Enter the relevant credentials into the fields outlined in the screenshot below to enable payments for sandbox (you will need to do the same for production):

A view of the Settings page for TrueLayer's plugin in WooCommerce
Updated about 1 year ago
Learn where to find the sandbox and production credentials for the plugin.
