Payments introduction
New to the Payments API v3? Start here.
You can use the Payments API v3 to enable a variety of payment types, such as:
- Single payments
A single independent payment made from a user account to an account that belongs to you or someone else. - Variable recurring payments
A series of payments made based on a mandate that determines payment amount and frequency. - Payouts
A payment is made from your merchant account to a user account. These can be closed-loop payouts or open-loop payouts. - Refunds
A payment, or payments, are made to a user account up to the amount of an initial payment a user made to you.
The above payment types belong to two categories:
- payments from an external account
- payments from your merchant account (payouts and refunds)
Supported countries
For more information on the providers we support by country, go to Console for a detailed list of providers.
Payments from an external account
The two types of payment from an external account using the Payments API are single payments and variable recurring payments.
The general flow of a payment or variable recurring payment from an external account is:
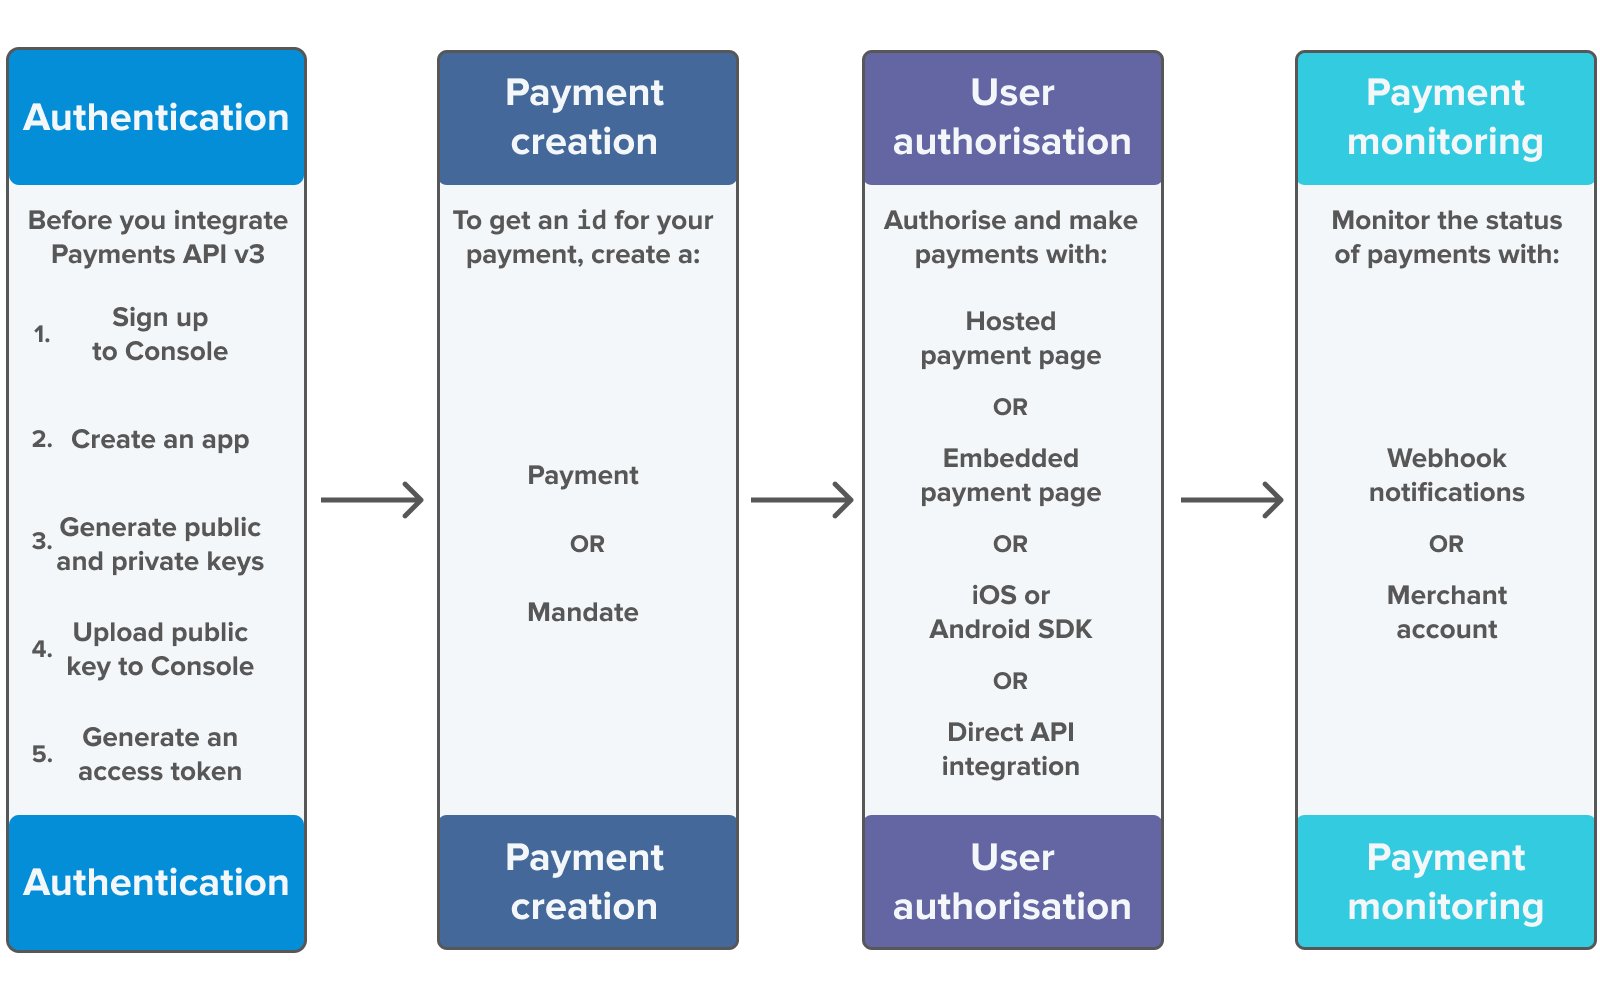
1. Authentication
The first step of a payment is authentication. You need to generate public and private keys to encrypt your payment requests, to upload them to Console, and generate an access token.
2. Payment creation
After authentication is set up, you can create a payment or mandate. There are a variety of integration methods available for you to create a payment. Depending on your needs and backend, you could use the HTTP flow, or our .NET or Java backend libraries.
When you gather the required details and create a payment, it returns an id, which you use for the next step of the payment: authorisation.
3. Payment user authorisation
After you create a payment, you need to gain the user's consent to make a payment, or to authorise a variable recurring payment mandate. There are a number of ways you can do this, such as our hosted payment page, embedded payment page, iOS and Android SDKs, or a direct API integration.
4. Payment monitoring
Once you've successfully received or facilitated user payments, you need to check their status. You can configure webhooks to do this. Or if you're receiving payments directly, you can view your merchant account in Console to check payments.
Payments from your merchant account
The two types of payments from your merchant account using the Payments API are payouts and refunds.
The general flow of a payment from your merchant account is:
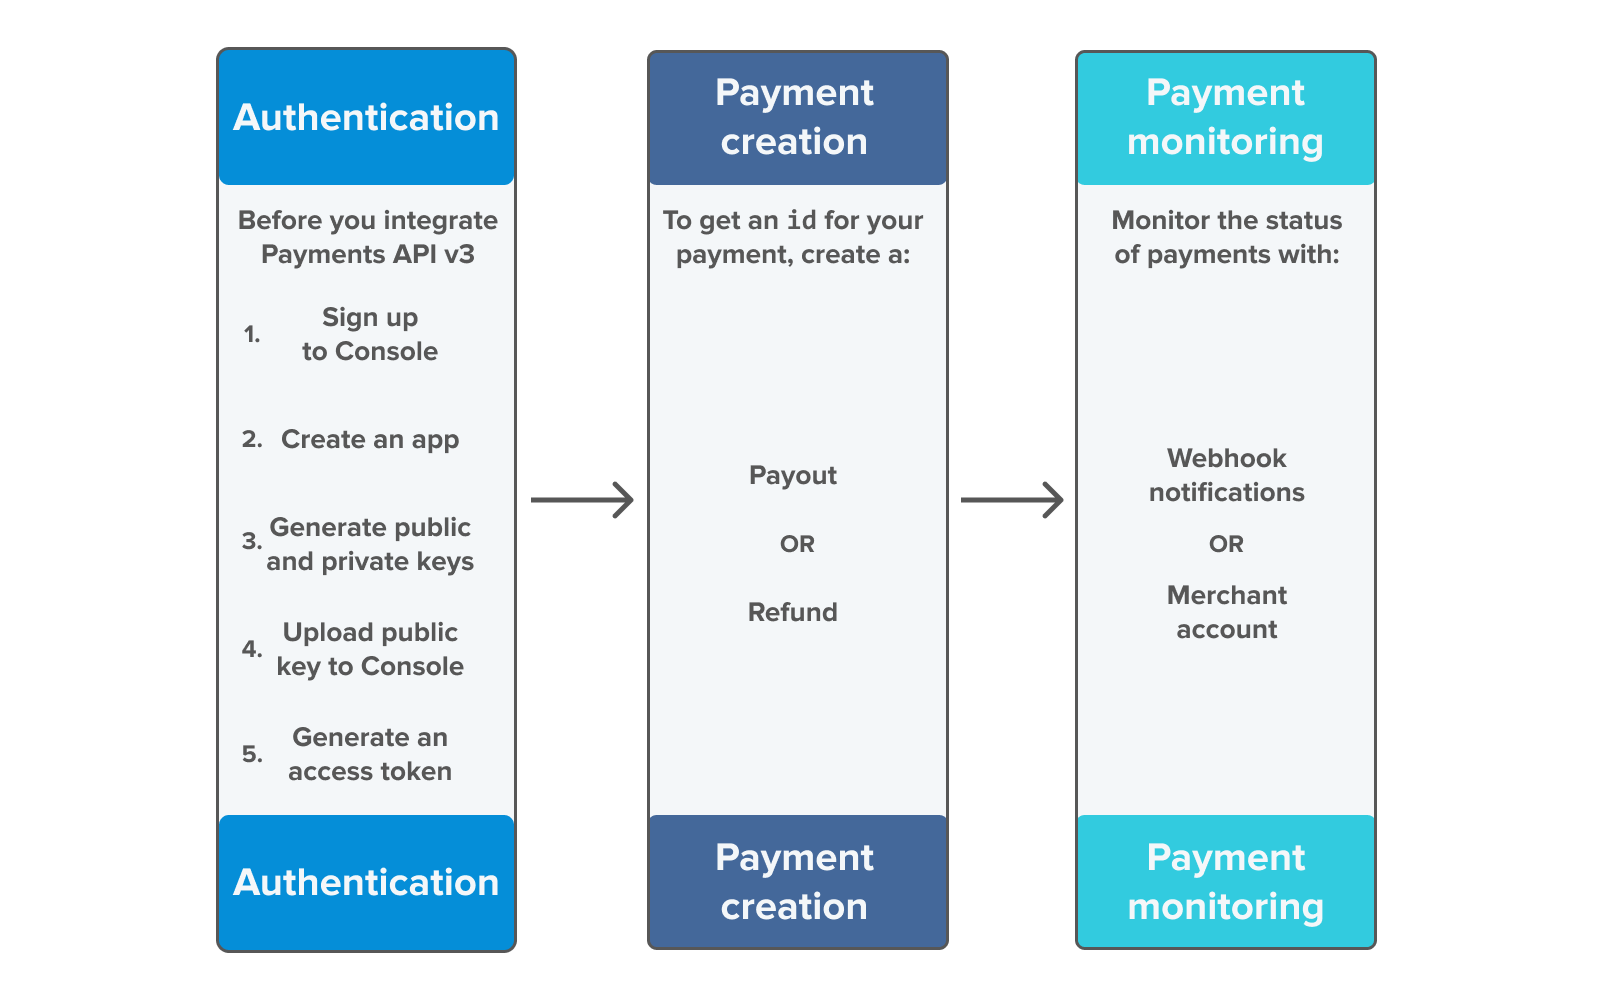
1. Authentication
The first step of a payment from your merchant account is authentication. You need to generate public and private keys to encrypt your payment requests, upload them to Console, and generate an access token.
2. Payment creation
Unlike a payment from an external account to you, no authentication from a user is required for payments from your merchant account. When you create the payout or refund, the payment is immediately sent to the bank for processing.
Once you collect the required details and create a payment from your merchant account, it returns an id, which you can use to monitor its status.
3. Payment monitoring
After you make a payout or refund, monitor its status with webhooks or the API.
You can also monitor incoming and outgoing transactions on the merchant account dashboard and payments view in Console.
Where to start
If you want to start testing quickly, consider completing the Payments quickstart guide, or using the Payments API Insomnia collection.
Before you can receive or make any payments with the Payments API you need to configure request signing and generate an access token to authenticate your requests.
After you have an access token, you can configure authorisation via a TrueLayer web or mobile app UI, or direct API integration. You can then create different payment types and test in sandbox.
Updated about 1 month ago